
From “Add Product” to “Add to Cart” – your first listing, step by step.
So you’ve installed WooCommerce and run the setup wizard. Your store is alive — but empty. Now comes the exciting part: adding your first products.
In this guide, I’ll walk you through:
- Simple products – the basics (price, stock, images)
- Variable products – sizes, colors, or any combination
- Digital/downloadable products – the key to selling plugins, e‑books, and other intangible goods (with a preview of licensing for plugins)
If you plan to sell WordPress plugins (as I do), pay special attention to the digital products section — that’s where we prepare the ground for license keys in later articles.
Let’s get your first product live.
Part 1: Product Types – What Are Your Options?
Before we start clicking, you should understand the six built‑in WooCommerce product types.
| Product Type | What It Does | Best For |
|---|---|---|
| Simple | One version, one price (with optional sale price) | A single‑option item – a book, a plugin, a standard service |
| Variable | Multiple variations (size, color, etc.), each with its own price/stock | T‑shirts in S/M/L, or a SaaS plan with monthly/yearly billing |
| Digital / Downloadable | Files delivered after purchase (often combined with Simple or Variable) | E‑books, software, music, courses, and of course WordPress plugins |
| Virtual | No shipping, no physical stock | Services, consultations, event tickets |
| Grouped | A collection of simple products sold together | A starter kit (“Camera + Lens + Bag”) |
| External (Affiliate) | Links to a product sold elsewhere | Your own affiliate offers or external marketplaces |
For most new stores (and especially for selling plugins), you’ll use Simple or Variable combined with the Downloadable checkbox.
Now, let’s build our first product from scratch.
Part 2: Adding a Simple Product (The Foundation)
A simple product is exactly what it sounds like: one item with one price. Think of a PDF guide, a standard license for a plugin, or a single physical product.
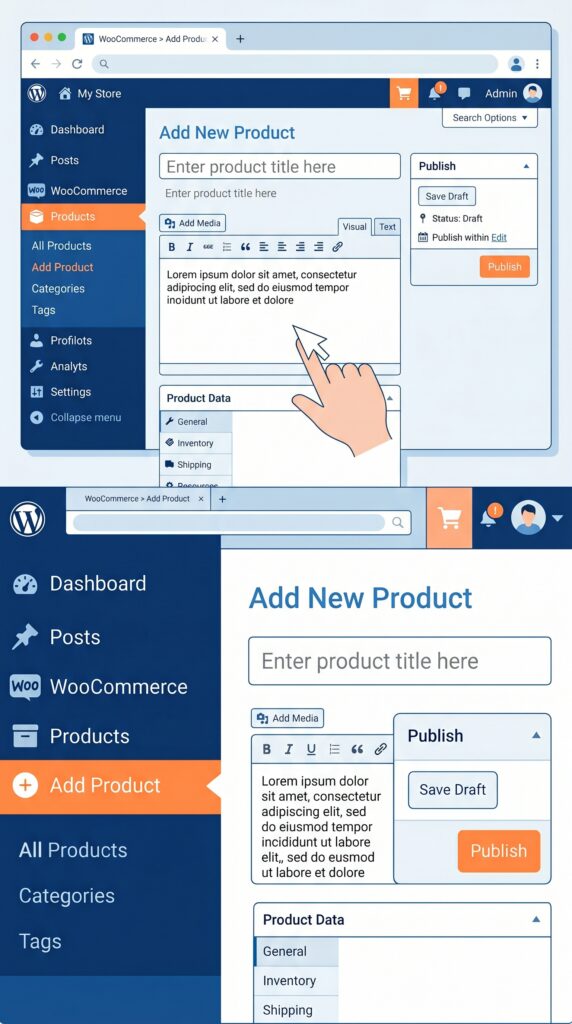
Step 1: Navigate to Add Product
From your WordPress dashboard: WooCommerce → Products → Add New .
Step 2: Basic Product Information
- Product name – Be clear. For a plugin: “Simple SEO Toolkit”. For a PDF: “WordPress Launch Checklist”.
- Product description – Main content area. Use blocks (Gutenberg) to add text, images, or videos.
- Short description – Appears next to the product image. Keep it concise, highlight key features and benefits.
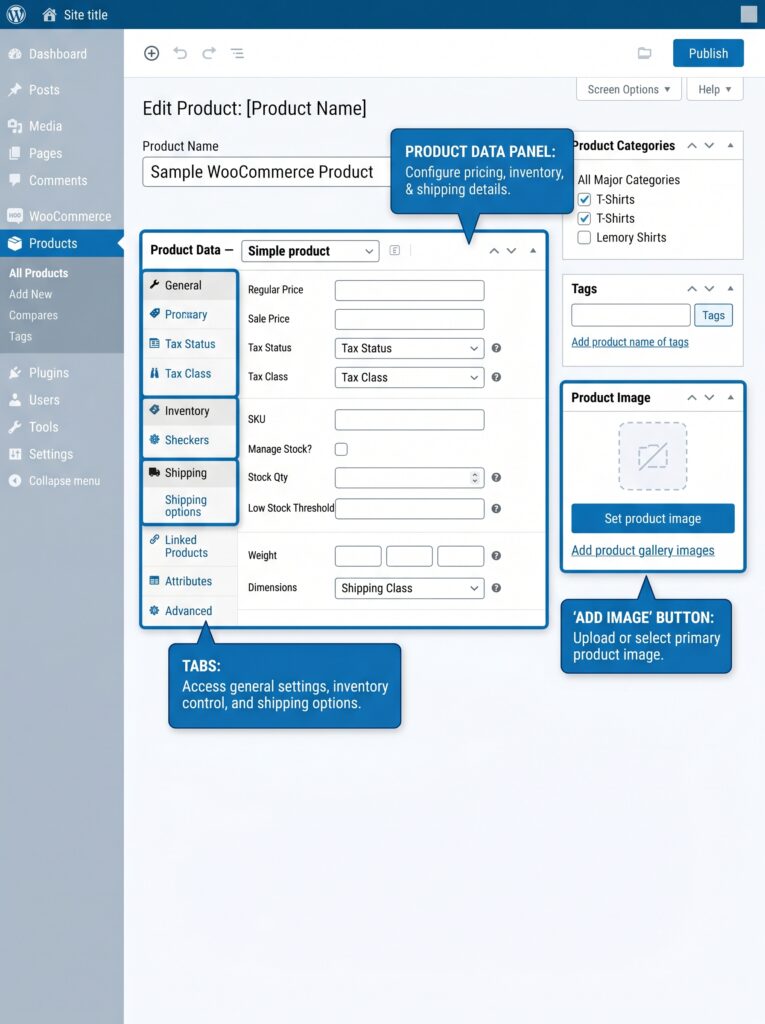
Step 3: Product Data Panel (This Is the Core)
Below the main editor, you’ll find the Product Data box. This is where the magic happens.
General tab
| Field | What to enter |
|---|---|
| Regular price | The normal price (e.g., $49) |
| Sale price | Optional discounted price |
If you need a temporary discount, fill in the sale price and optionally set sale schedule dates.
Inventory tab
- SKU (Stock Keeping Unit) – Your internal identifier (e.g., “SEO‑PLG‑001”). Optional but helpful.
- Stock status – “In stock” / “Out of stock” / “On backorder”.
- Manage stock? – Enable this if you want WooCommerce to track inventory.
- Stock quantity – How many copies you have (for downloadable products, this could be unlimited — leave it blank).
💡 For digital products, you can usually ignore stock tracking unless you have a limited number of license keys.
Shipping tab
For physical products: enter weight and dimensions, plus a shipping class if needed.
For digital or virtual products – we’ll handle this in Part 4.
Linked Products tab
Here you can define:
- Upsells – Products you’d like to promote instead of the current one (e.g., a premium plugin instead of the free version).
- Cross‑sells – Products you want to promote alongside the current one (e.g., “Customers who bought this plugin also bought this add‑on”).
Attributes tab
Used to add extra information (size, color, format). For simple products, you can often skip this.
Step 4: Product Image & Gallery
- Product image – The main image shown across the store and at the top of the product page.
- Product gallery – Additional images for the product page (multiple angles, screenshots of your plugin, etc.).
Upload high‑quality, consistent images. For plugins, a screenshot of the settings page can be very effective.
Step 5: Publish
Click “Publish” (or “Save Draft” if you’re not ready). Your first product is now visible on your shop page.
Part 3: Variable Products (For Sizes, Colors, and Bundles)
If you have a product that comes in multiple variations — a T‑shirt in different sizes, a subscription with monthly/yearly billing, or a plugin with single‑site versus unlimited‑site licenses — you need a variable product.
Step 1: Create Attributes
- From the Product Data dropdown, select “Variable product”.
- Go to the Attributes tab.
- Click “Add New” (or choose an existing global attribute).
- Name – Size, Plan, License tier, etc.
- Value(s) – Enter each option separated by a vertical bar (
|). For example:Small | Medium | LargeorSingle site | 5 sites | Unlimited sites.
- Check “Used for variations” and click “Save attributes”.
Step 2: Generate Variations
- Go to the Variations tab.
- Select “Create variations from all attributes” from the dropdown.
- Click “Go” – WooCommerce will create every possible combination of your attributes.
Step 3: Configure Each Variation
For each variation, you can set:
| Setting | What to do |
|---|---|
| Enabled | Check or uncheck to make the variation available |
| Price | Regular price for this specific option |
| Stock status | In stock / out of stock per variation |
| Image | Optionally, assign a different image for this variation |
| Downloadable files | Yes – you can even make each variation downloadable (perfect for product‑specific license keys) |
Expand the variation entry (by clicking on it), fill in the details, and click “Save changes”.
💡 For variable downloadable products, each variation can have its own download file or license key settings. This is extremely useful if you sell different versions of a plugin with different feature sets.
Step 4: Default Variation (Optional)
Under the Variations tab, you can set a default variation — the option that is preselected when the customer first lands on the page. This reduces friction and encourages clicks.
Step 5: Publish Your Variable Product
Check the front end. Your customers should now see a dropdown menu (or radio buttons) allowing them to choose between options before clicking “Add to Cart”.
Part 4: Digital and Downloadable Products (For Plugin Sellers)
This section is crucial if you sell digital goods — WordPress plugins, e‑books, software, music, or any intangible product.
Prerequisite: Global Downloadable Settings
Before creating your first digital product, ensure your global settings are correct. Go to WooCommerce → Settings → Products → Downloadable Products.
| Setting | Recommended Value | Why |
|---|---|---|
| File download method | Force Downloads | Protects files from direct URL access; routes all downloads through PHP |
| Access restriction | Purchases only | Ensures only paying customers can access download links |
| Grant access after payment | Enabled (checked) | Unlocks downloads immediately upon payment |
The File Download Method is especially important. “Force Downloads” is the most secure option for most stores because it prevents customers from sharing direct file URLs. “Redirect” (the default) is the least secure; avoid it for anything that must stay protected.
Creating a Simple Downloadable Product
- Add a new product (Products → Add New).
- Give it a name and a price.
- In the Product Data panel, check two boxes:
- Virtual – removes all shipping fields (nothing physical is being sent).
- Downloadable – reveals the download options.
- Add your file(s):
- In the Downloadable Files section, click “Add File”.
- Enter a File name (e.g., “Plugin ZIP”).
- For the File URL, you can either:
- Upload the file to your Media Library and copy the URL.
- Enter a full URL if the file is hosted elsewhere (e.g., on Amazon S3).
- Set download limits (optional):
- Download limit – Number of times a customer can download the file (leave blank for unlimited).
- Download expiry – Number of days after which the download link expires (leave blank for no expiration).
- Publish the product.
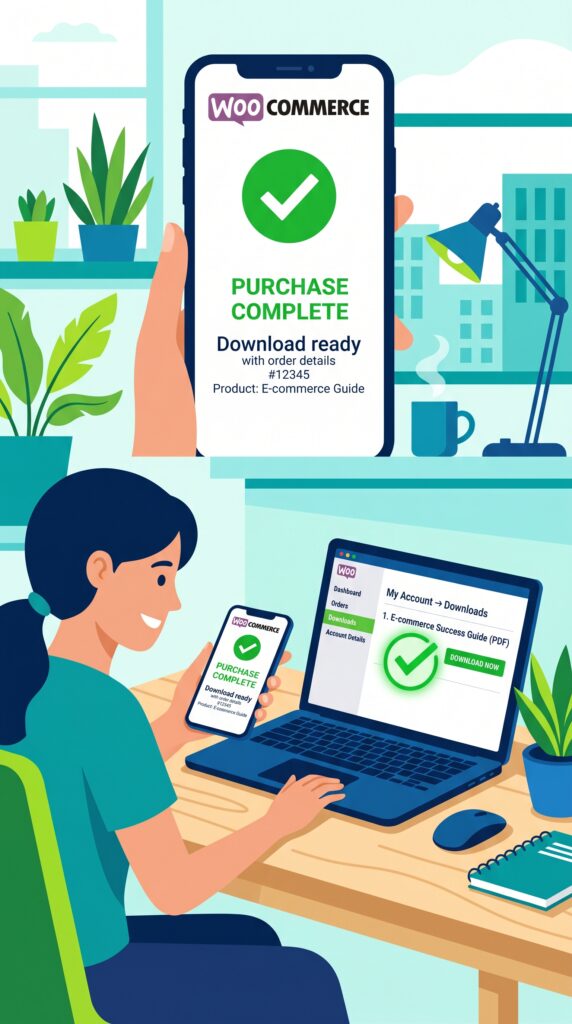
💡 Orders that contain only virtual and downloadable products skip the “Processing” status and go directly to “Completed” automatically. This is intentional — WooCommerce assumes no physical shipping is involved.
What About License Keys?
WooCommerce’s built‑in downloadable product system works perfectly for one‑time downloads (PDFs, ZIP files of free plugins). However, if you want to sell license keys that customers can use to activate software, you’ll need a dedicated licensing plugin.
In the next article, we’ll install and configure the free Serial Numbers plugin, which integrates seamlessly with WooCommerce and allows you to:
- Generate unique license keys automatically
- Deliver keys after purchase (by email and in the My Account area)
- Limit activations per license
- Track which customers are using which keys
For now, setting up your product as downloadable and virtual is the foundation. The license layer comes right after.
Part 5: What About Product Variations? A Quick 2026 Update
Two small but helpful improvements arrived in recent WooCommerce versions:
- Variable products (those with multiple dropdown options) now handle safer “Add to Cart” logic. On slower connections, the button stays disabled until all options have fully loaded, preventing customers from placing an order before a variation has been selected.
- Better product URLs for SEO: product links that include categories now use the most specific category rather than the broadest parent, giving search engines clearer signals about your products.
Neither of these changes requires action from you — they just make your store work better out of the box.
Part 6: Testing Your Product (Always Do This)
Before you start marketing your product, run a quick test purchase.
- Go to your shop page – Can you see the product?
- Click through to the single product page – Do images load? Is the description readable?
- Add to cart – Does the cart page display the correct price?
- Proceed to checkout – Enter test information (most payment gateways offer test mode).
- Complete the purchase – Do you receive the order confirmation email? Does the customer receive the download link (for digital products)?
- Check the My Account area – Can the customer access the download link again later?
Catch any issues now. Trust me — it’s better than discovering them after your first real order.
Part 7: Common Beginner Mistakes (And How to Avoid Them)
| Mistake | Consequence | Fix |
|---|---|---|
| Forgetting to enable “Virtual” for digital products | Customer is asked for shipping address, which may confuse them | Edit product → check “Virtual” |
| Not setting download limits | Customers can share the download link with anyone | Set a reasonable limit (e.g., 5 downloads) |
| Using “Redirect” file download method | File URL is exposed; customers can share links without paying | Go to WooCommerce → Settings → Products → Downloadable Products → choose “Force Downloads” |
| Uploading huge files directly to Media Library | Slows down your site and may exceed hosting limits | Use cloud storage (Dropbox, Google Drive) or a dedicated CDN for large files |
| Not testing the purchase flow | First real customer runs into a bug, leaves bad review | Always test with a sandbox payment method |
What’s Next?
You’ve successfully added your first product. Now it’s time to make it truly professional — with license keys.
👉 Next article: License Keys for WooCommerce – Selling WordPress Plugins the Right Way (Installing and configuring the Serial Numbers plugin)
We’ll cover how to:
- Generate unique license keys automatically
- Deliver them via email and the My Account dashboard
- Limit activations and track customer usage
- Validate licenses via an external API (if you choose to add that later)
What kind of product did you add first? A plugin, an e‑book, a physical item? Let me know in the comments — I’d love to hear about your store.
📌 Key Takeaways (for skimmers)
- Simple product – one version, one price. The easiest way to start.
- Variable product – multiple options (size, tier, color). Each variation can have its own price, stock, image, and even downloadable file.
- Digital / Downloadable product – check “Virtual” and “Downloadable” in the Product Data panel. Add your files, set optional download limits and expiry.
- Global downloadable settings matter: set “Force Downloads” for security, “Purchases only” for access restriction, and enable grant after payment.
- Always test your product before marketing it — cart, checkout, and the My Account download area.
- License keys are not built into WooCommerce, but we’ll add them in the next article using the free Serial Numbers plugin.
🔗 Internal Links (add your own URLs when published)
- Article #1 – WooCommerce in 2026 – Market Share & Trends
- Article #2 – Installing WooCommerce & Setup Wizard
- You are here – Adding Your First Product
- Article #4 – License Keys for WooCommerce (coming soon)