
From zero to a fully functional online store – in under 15 minutes.
In the first article of this series, I explained why WooCommerce dominates e‑commerce in 2026. Now it’s time to get your hands dirty.
Installing WooCommerce is simple. But configuring it correctly from the start saves you hours of headaches later – especially when you start selling digital products with license keys.
In this guide, I’ll walk you through:
- Installing the WooCommerce plugin
- Running the Setup Wizard (step by step)
- Choosing currency, tax, shipping, and payment methods
- Creating the essential WooCommerce pages (Cart, Checkout, My Account, Shop)
- Integrating WooCommerce with the Kadence theme (so your store matches your site)
- First settings after the wizard
No prior experience needed. Let’s build your store.
Part 1: Installing WooCommerce (2 Minutes)
Before you start, make sure you have:
- A working WordPress site (I assume you do, from the first series)
- Admin access to your dashboard
- No other e‑commerce plugin installed (conflicts)
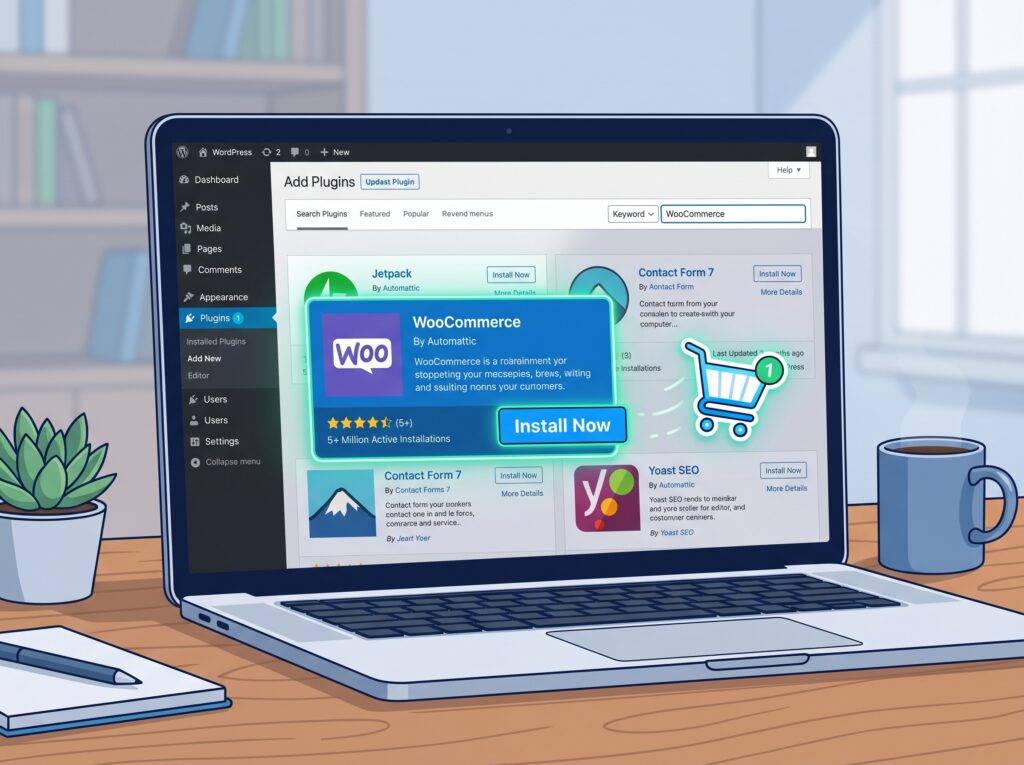
Step 1: Add the plugin
- In your WordPress admin, go to Plugins → Add New.
- In the search box, type “WooCommerce”.
- Look for the plugin with the WooCommerce logo (it should be the first result, with “Millions of active installations”).
- Click “Install Now”, then “Activate”.
That’s it. WooCommerce is now active. But you’re not done – the plugin will automatically redirect you to the Setup Wizard.
If it doesn’t, go to WooCommerce → Home and click the “Setup Wizard” button.
Part 2: The Setup Wizard – Step by Step
The Setup Wizard is your best friend. It guides you through all essential configuration. Do not skip it – you’ll thank me later.
Step 1: Store Details
You’ll be asked for:
| Field | What to enter | Notes |
|---|---|---|
| Store address | Your real business address (or home address if you’re a sole trader) | Used for tax calculations and shipping zones |
| Country / Region | Where you operate from | Affects tax settings |
| Currency | Choose your store currency (e.g., USD, EUR, GBP) | The currency your customers see |
| Currency position | Left or right of the amount (e.g., 10or10) | Left is standard |
| Thousand separator | Usually comma (,) or space | Leave as default unless you know better |
| Decimal separator | Usually period (.) | |
| Number of decimals | 2 | For dollars/cents |
💡 If you’re selling plugins globally, set currency to USD – it’s the most recognised.
Step 2: Payment Methods
WooCommerce asks you which payment methods to enable. I recommend starting with:
- WooPayments (formerly WooCommerce Payments) – Accepts credit cards, Apple Pay, Google Pay, and more. No monthly fee, only transaction fees.
- PayPal – Still widely used, especially by international customers.
You can add more later (Stripe, bank transfers, etc.). For now, enable one or two.
Step 3: Shipping Zones
If you sell physical products, you need shipping. For digital products (like plugins), you can skip shipping entirely – WooCommerce will detect that your products are digital and won’t ask for shipping addresses.
But since you might sell both, let’s configure a basic setup:
- Domestic shipping (your country): flat rate or free over a certain amount
- Rest of the world: flat rate (or disable if you don’t ship internationally)
You can refine this later. For digital‑only stores, just click “Skip”.
Step 4: Tax
Tax can be complicated. The wizard offers two options:
- I don’t charge tax – If you’re a small creator selling digital products, you may not need to collect tax (depending on your jurisdiction).
- I charge tax – WooCommerce will enable basic tax rates.
For plugin sellers, many countries require VAT handling for digital goods sold to EU customers. I’ll cover tax automation in a later article. For now, select “I don’t charge tax” if you’re uncertain – you can always enable it later.
Step 5: Recommended Plugins
The wizard may suggest additional WooCommerce extensions (mailchimp, Google Listings & Ads, etc.). You can skip or install them later. I recommend not installing extras during setup – test your store first.
Step 6: Create Essential Pages
WooCommerce automatically creates:
| Page | URL | Purpose |
|---|---|---|
| Shop | /shop | Displays all products |
| Cart | /cart | Shows selected items before checkout |
| Checkout | /checkout | Collects payment and shipping info |
| My Account | /my-account | Customer area – orders, addresses, downloads, license keys |

The wizard creates these pages automatically. Just confirm they’ve been added.
Step 7: Finish
Click “Let’s Go” or “Finish”. WooCommerce will redirect you to its home dashboard.
Congratulations – your store is now live (even without products).
Part 3: First Settings After the Wizard
The wizard covers basics, but you need a few more tweaks before adding products.
General Settings (WooCommerce → Settings → General)
Double‑check these:
- Base location – Your store’s country.
- Selling locations – “Sell to all countries” (unless you restrict).
- Default customer location – “Geolocate” (uses IP address) or “No location by default”.
- Enable taxes – Enable if you ever plan to sell physical goods or comply with EU VAT.
- Enable coupons – Yes (coupons are great for promotions).
Product Settings (WooCommerce → Settings → Products)
| Section | Recommended setting |
|---|---|
| Shop page | Set to /shop (already created) |
| Measurement units | cm, g (or kg) – not critical for digital products |
| Weight unit | kg or lb |
| Dimensions unit | cm or in |
| Reviews | Enable if you want customer feedback (recommended) |
Downloadable Products (crucial for plugin sellers)
Since you plan to sell plugins, this section is key.
Go to WooCommerce → Settings → Products → Downloadable Products.
- File download method – “Force downloads” (protects links, prevents hotlinking)
- Access restriction – “Downloads require login” (ensures only paying customers can access)
- Grant access – “Upon payment” (access granted immediately after successful payment)
We’ll configure license keys separately in a future article using the Serial Numbers plugin.
Part 4: Integrating WooCommerce with Kadence Theme
You’re using the Kadence theme (excellent choice). Kadence has built‑in WooCommerce integration – no extra plugins needed for basic styling.
Step 1: Check Kadence WooCommerce settings
Go to Appearance → Customize → WooCommerce.
You’ll see options for:
| Setting | What to do |
|---|---|
| Shop page layout | Choose grid or list (grid is standard) |
| Columns | 3 or 4 columns (start with 3) |
| Products per row | Same as columns |
| Product image size | Keep as default (usually 300px) |
| Cart and checkout | Leave as “Use WooCommerce defaults” unless you want Kadence styling |
Step 2: Customize the My Account page
Kadence allows you to style the My Account dashboard. Under Appearance → Customize → WooCommerce → My Account.
Make sure your logo and header match your brand. The My Account page is where customers will see their license keys and manage downloads – you want it to look professional.
Step 3: Ensure header and footer consistency
Your Kadence header/footer should automatically appear on WooCommerce pages. If they don’t, go to Appearance → Customize → Header and check that the menu and logo are set for all pages.
Part 5: Testing Your Store
Before adding any products, run these tests:
- Visit the Shop page – Should display “No products found” (fine for now).
- Visit the Cart page – Should be empty, but layout should match your theme.
- Visit the Checkout page – Should show fields for billing/shipping (if you enabled shipping) or just billing (for digital products).
- Visit the My Account page – Should show login/register form. Try registering a test account.
If any page shows a 404 error, go to Settings → Permalinks and click “Save” (even without changes) – this flushes rewrite rules.
Part 6: Next Steps After Installation
Now that WooCommerce is installed and configured, here’s what’s coming in this series:
- Adding your first product – Simple, variable, and downloadable (with license key preparation)
- Setting up license keys for plugins – The free Serial Numbers plugin explained
- Customising the checkout for digital products – Remove unnecessary shipping fields
- Email automation – Send license keys after purchase
- Managing orders and customers – HPOS and order tracking
- Marketing and coupons – How to offer discounts
The next article will focus on creating your first product – a simple digital download (like a PDF or demo plugin) without license keys yet, just to understand the workflow.
Troubleshooting Common Installation Issues
Issue 1: WooCommerce pages return 404
Fix: Go to Settings → Permalinks and click “Save Changes”. Then go to WooCommerce → Status → Tools and click “Create default WooCommerce pages” (if they’re missing).
Issue 2: Checkout doesn’t look right with Kadence
Fix: In Appearance → Customize → WooCommerce → Cart & Checkout, set layout to “Full width” (removes sidebar). If issues persist, temporarily switch to a default theme (like Twenty Twenty‑Four) to see if it’s a Kadence conflict.
Issue 3: Payment methods not showing
Fix: In WooCommerce → Settings → Payments, enable at least one payment gateway (e.g., WooPayments or PayPal). Ensure your currency matches the gateway’s supported currencies (e.g., PayPal supports most currencies, but some gateways are limited).
Issue 4: Tax not calculating
Fix: Enable tax in WooCommerce → Settings → General. Then go to WooCommerce → Settings → Tax and add a standard rate for your country. For digital products sold to EU customers, you’ll need more complex rules – I’ll cover that in a dedicated article.
What’s Next?
You have a fully functional WooCommerce store. The foundation is solid. Now let’s add products.
👉 Next article: Adding Your First Product – Simple, Variable, and Digital Downloads (No License Keys Yet)
Did you run into any issues during installation? Let me know in the comments – I’ll help you troubleshoot.
📌 Key Takeaways (for skimmers)
- Install WooCommerce via Plugins → Add New, then run the Setup Wizard.
- During wizard: set your store address, currency, payment methods (WooPayments + PayPal), and skip shipping if selling digital products.
- Essential pages (Shop, Cart, Checkout, My Account) are auto‑created.
- First manual settings: enable coupons, set downloadable file method to “Force downloads”, require login for access.
- Kadence integrates seamlessly – customise shop layout and my account via Customizer.
- Test your store before adding products (shop, cart, checkout, my account).
- Troubleshoot 404s by saving permalinks or recreating WooCommerce pages.