
Go beyond the defaults. Customize every pixel without breaking your site.
The block editor is powerful out of the box. But sometimes you need that extra bit of control – a specific hover effect, a unique border, a background gradient that isn’t available in the color picker, or a layout tweak that no block setting provides.
In this guide, I’ll show you advanced techniques:
- Adding custom CSS to individual blocks, specific pages, or your whole site
- Creating custom block styles (e.g., a “warning” style for the Paragraph block)
- Using the Code Editor for fine‑grained control
- Understanding HTML anchors and additional CSS classes
- Developer tools (Inspector, browser console)
- When it’s appropriate to reach for code – and when it’s not
No deep PHP knowledge required. Just a willingness to copy, paste, and tweak.
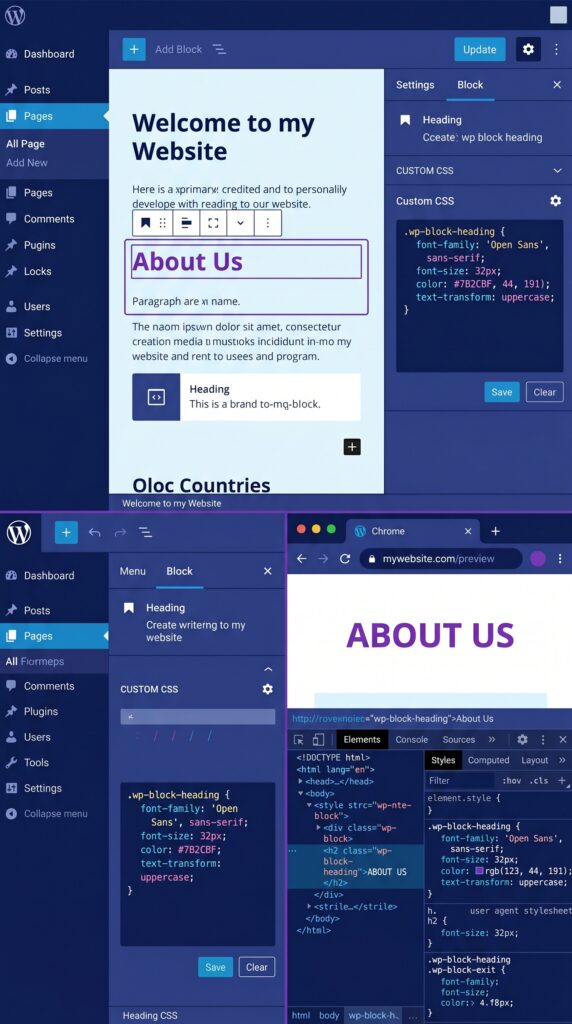
Part 1: Adding Custom CSS to Individual Blocks
Sometimes you need a one‑off style for a single block – a special background, extra padding, a unique hover effect. WordPress gives you a built‑in way to do this without touching your theme files.
The “Advanced” block settings panel
Select any block. In the right sidebar, click the “Advanced” section (expand it). You’ll see two fields:
- HTML anchor – adds an
idattribute (e.g.,id="my-special-section"). Use this to target exactly one block on the page. - Additional CSS class(es) – adds one or more custom classes (e.g.,
my-custom-box). Use this to target groups of blocks.
Step‑by‑step: add custom CSS to one specific block
- Select the block.
- In Advanced, give it an HTML anchor like
hero-cta. - Go to Appearance → Customize → Additional CSS (or use a child theme’s
style.css, or the Site Editor → Styles → Additional CSS if using block theme). - Add your CSS:
css
#hero-cta {
    background: linear-gradient(135deg, #667eea 0%, #764ba2 100%);
    border-radius: 16px;
    padding: 40px;
    color: white;
}
- Publish. That block now has a unique gradient background.
Step‑by‑step: add custom CSS to all blocks with a specific class
- Select the blocks you want to style similarly. In Advanced, give each the same class, e.g.,
fancy-card. - In Additional CSS (Customizer or Site Editor):
css
.fancy-card {
    box-shadow: 0 10px 25px rgba(0,0,0,0.1);
    transition: transform 0.2s ease;
}
.fancy-card:hover {
    transform: translateY(-5px);
}
- All blocks with that class now share the same hover effect.
Where to add custom CSS – options compared
| Method | Best for | Notes |
|---|---|---|
| Customizer → Additional CSS | Quick, theme‑independent | Works with any theme, persists across updates |
| Site Editor → Styles → Additional CSS | Block themes | Modern FSE way |
| Child theme style.css | Permanent, version‑controlled | Requires creating a child theme |
| Plugin (e.g., Simple Custom CSS) | Non‑technical users | Adds a separate CSS editor |
| Block’s “Custom CSS” (Kadence Blocks Pro) | Per‑block inline | Convenient but ties CSS to that specific block |
My recommendation: Use the Customizer Additional CSS for most small tweaks. It’s safe, doesn’t break on theme updates, and is easy to disable if something goes wrong.
Part 2: Targeting Specific WordPress Blocks with CSS
To style blocks intelligently, you need to know their CSS classes. Here are the most common:
| Block | Default CSS class(es) |
|---|---|
| Paragraph | wp-block-paragraph |
| Heading | wp-block-heading |
| Image | wp-block-image |
| Button | wp-block-button (outer) and .wp-block-button__link (link) |
| Columns | wp-block-columns |
| Column (inside) | wp-block-column |
| Group | wp-block-group |
| Query Loop | wp-block-query |
| Post Template (inner) | wp-block-post-template |
| List | wp-block-list |
| Quote | wp-block-quote |
| Pullquote | wp-block-pullquote |
| Separator | wp-block-separator |
| Spacer | wp-block-spacer |
Example: style all buttons globally
css
.wp-block-button__link {
    border-radius: 8px;
    font-weight: 600;
    text-transform: uppercase;
}
Example: add a border to all groups
css
.wp-block-group {
    border: 1px solid #e2e8f0;
    border-radius: 12px;
    padding: 24px;
}
Example: limit image width inside columns on mobile
css
@media (max-width: 768px) {
    .wp-block-column img {
        max-width: 100%;
        height: auto;
    }
}
Part 3: Custom Block Styles (Built‑in Way)
WordPress allows theme developers to register custom block styles – alternative visual variants of existing blocks that appear in the block toolbar.
For example, a Paragraph block could have a “Warning” style (yellow background) and a “Note” style (blue background). Users can switch styles without touching CSS.
How to create custom block styles (no plugin required)
You need to add a small PHP snippet to your theme’s functions.php (or a custom plugin). Here’s a working example:
php
// Register custom block style for the Paragraph block
function mytheme_register_block_styles() {
    register_block_style(
        'core/paragraph',
        array(
            'name'  => 'warning',
            'label' => __( 'Warning', 'mytheme' ),
            'inline_style' => '
                .is-style-warning {
                    background-color: #fff3cd;
                    border-left: 4px solid #ffc107;
                    padding: 12px 16px;
                    border-radius: 4px;
                }
            '
        )
    );

    register_block_style(
        'core/paragraph',
        array(
            'name'  => 'note',
            'label' => __( 'Note', 'mytheme' ),
            'inline_style' => '
                .is-style-note {
                    background-color: #d1ecf1;
                    border-left: 4px solid #17a2b8;
                    padding: 12px 16px;
                    border-radius: 4px;
                }
            '
        )
    );
}
add_action( 'init', 'mytheme_register_block_styles' );
How users select the style: Select a Paragraph block → in the block toolbar, click the “Styles” icon (half‑filled circle) → choose “Warning” or “Note”.
Benefits: No CSS classes to remember. Editors see a dropdown. Styles are themable and consistent.
You can add custom styles to any core block: core/button, core/group, core/quote, etc.
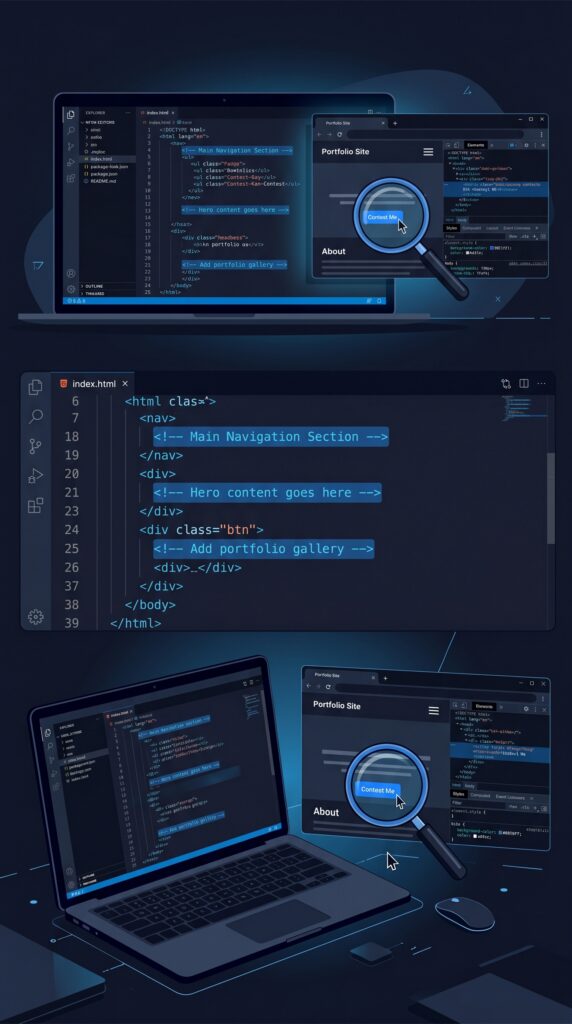
Part 4: Using the Code Editor (When Blocks Get in the Way)
The visual block editor is great, but sometimes you need to see – or directly edit – the underlying HTML/block markup. That’s where the Code Editor comes in.
How to switch: In the post/page editor, click the three dots (⋮) top right → Code Editor (or press Ctrl+Shift+Alt+M).
What you’ll see
Instead of blocks, you’ll see HTML comments like:
html
<!-- wp:heading {"level":2} -->
<h2>My Heading</h2>
<!-- /wp:heading -->

<!-- wp:paragraph -->
<p>Some text here.</p>
<!-- /wp:paragraph -->
When to use Code Editor
- Debugging – see if a block is missing a closing tag.
- Copy‑pasting complex layouts between pages (copy the entire HTML block).
- Fixing broken blocks – sometimes a block errors and you need to remove its markup manually.
- Search and replace – change all H2 headings to H3 across a page (advanced, but possible).
When NOT to use Code Editor
- You’re not comfortable with HTML – one typo can break the page.
- You want to quickly edit text – visual editor is faster.
- You’re working with dynamic blocks (Query Loop, Latest Posts) – their HTML is generated by WordPress.
Pro tip: Always switch back to Visual Editor after making Code Editor changes. You can preview and see if blocks are valid.
Part 5: Browser Developer Tools – Your Best Friend
Every browser has built‑in developer tools (F12 or right‑click → Inspect). These are essential for advanced CSS work.
How to use DevTools for block styling
- Right‑click on any element on your live site.
- Click Inspect.
- On the right panel, you’ll see the CSS applied to that element.
- You can edit CSS live (temporarily) – change colors, margins, borders – to test before copying to your actual CSS.
- When satisfied, copy the CSS rule and paste it into your Customizer Additional CSS.
Pro workflow example
- You want to change the font size of all H2 headings inside the Query Loop grid.
- Inspect an H2 from a live post grid.
- See that the class is
wp-block-post-title(depending on your Post Template structure). - Experiment with
font-size: 1.8remin the DevTools. - See it work.
- Copy that rule to Customizer CSS.
No guessing.
Part 6: HTML Anchor (ID) vs Additional CSS Class
| Feature | HTML anchor (ID) | Additional CSS class |
|---|---|---|
| Uniqueness | Must be unique per page | Can be repeated |
| Use case | Link to a specific block (scroll to section) | Style multiple blocks together |
| Example | #contact-form | .rounded-corners |
| CSS selector | #contact-form { } | .rounded-corners { } |
When to use an anchor (ID)
- You want to create jump links (internal page navigation).
- You need to target exactly one block with no others affected.
Example link: yoursite.com/page#pricing-table – scrolls directly to the block with id="pricing-table".
When to use a class
- You want to apply the same style to many blocks (e.g., all buttons with “large”).
- You want to reuse a style across different pages.
Part 7: When to Reach for Code (and When to Stop)
One of the biggest mistakes beginners make is using CSS to solve problems that should be solved with theme settings or block choices.
✅ Good reasons to add custom CSS
- A specific hover effect not available in the block settings
- A unique gradient background for a hero section
- Custom bullet styles for lists (e.g., checkmarks)
- Changing the font of only the site title
- Adding a subtle box‑shadow to all cards
- Responsive tweaks (adjust padding on mobile)
❌ Bad reasons to add custom CSS
- You haven’t checked if a block setting exists (e.g., color, font size, margin)
- You’re fighting your theme instead of using its global styles
- The change is purely structural (use a different block layout instead)
- You’re adding huge amounts of CSS for simple things – maybe your theme is the wrong choice
Rule of thumb: If you find yourself adding more than 20 lines of CSS for a basic layout, step back. Consider using a different block combination, adjusting theme settings, or even switching themes.
Part 8: WordPress 6.6+ Advanced Features (Brief)
Recent WordPress versions added built‑in capabilities that reduce the need for custom CSS:
- Background images on Group, Columns, and Cover blocks (more flexible)
- Aspect ratio for Image, Cover, Post Featured Image blocks
- Margin and padding controls for almost every block (no more spacer hacks)
- Box shadow (native) – available in many blocks under “Advanced” or “Styles”
- Duotone filters for images
Always check if a feature exists natively before reaching for CSS.
Pro Tips Summary
- Use Additional CSS in Customizer for site‑wide tweaks – safe and theme‑update proof.
- Use HTML anchors for jump links, classes for reusable styling.
- Browser DevTools (F12) are your best debugging friends.
- Custom block styles (via PHP) are elegant for paragraph variants (warning, note, tip).
- Don’t over‑CSS – try to solve with built‑in settings first.
- Code Editor is powerful but dangerous – switch back to visual editor after edits.
What’s Next?
You now have superpowers. The final article in this series will cover WordPress 6.7+ and the Future of Gutenberg – what’s coming, and how to stay ahead.
👉 Next article (finale): The Future of Gutenberg – What’s Coming in WordPress 6.7 and Beyond
Do you use custom CSS on your site? What’s the most useful snippet you’ve added? Share in the comments.
📌 Key Takeaways (for skimmers)
- Custom CSS can be added via Customizer → Additional CSS or Site Editor → Styles → Additional CSS.
- Use HTML anchor (id) for unique, one‑off targeting and jump links.
- Use Additional CSS class for reusable styles across multiple blocks.
- Browser DevTools let you test CSS live before committing.
- Custom block styles (PHP) provide users with style variants in the block toolbar.
- Code Editor shows raw block markup – useful for debugging.
- Don’t overuse CSS – many things can be done with native block settings.
🔗 Internal Links
- Article #1 – Gutenberg Introduction
- Article #4 – Design Blocks
- Article #7 – Full Site Editing
- Article #8 – Block Patterns & Reusable Blocks