

A beginner’s guide to creating content that people can actually find.
You’ve installed WordPress. You’ve set up your theme and built a homepage. Now comes the fun part — writing your first blog post.
But where do you even start? What makes a good post? And how do you make sure people find it on Google?
When I wrote my first post (the “Why I Built My Site” article), I had no idea about SEO, categories, or meta descriptions. I just wrote what I felt. And that’s fine — but over time, I learned a few simple tricks that make a huge difference.
In this guide, I’ll walk you through:
- Choosing the right category and tags
- Structuring your post for readers and search engines
- Adding images (and why alt text matters)
- Basic SEO with a free plugin (RankMath)
- Publishing vs. drafting — and what to do after
Let’s turn your ideas into a real, findable blog post.
1. Before You Write: Categories vs. Tags
Many beginners confuse these. Here’s the simple difference:
- Categories – broad topics that group your posts. Each post belongs to one main category (sometimes more, but one is best for structure).
- Tags – specific keywords or details. You can use many tags per post, but don’t overdo it.
Example for this site:
If I write about hosting, the category is “Hosting & Performance”, and tags might be: shared hosting, VPS, SiteGround, page speed.
How to set them up
- Go to Posts → Categories – create 3–5 main categories for your site. For my blog, I created:
- WordPress Zero to Hero
- Hosting & Performance
- Plugins Deep Dive
- Go to Posts → Tags – you can add tags while writing the post, no need to pre-create them.
💡 Pro tip: Don’t create a tag called “WordPress” if you have a whole category about WordPress. Tags should be more specific.
2. Writing Your Post: Structure & Content
Open the WordPress editor: Posts → Add New.
Title
Make it clear and compelling. Include your main keyword naturally. For this post, my title is:How to Write Your First Blog Post (And Get It Found)
Permalink (URL)
WordPress automatically generates a URL from your title. Edit it if needed — keep it short and use hyphens. For this post:how-to-write-first-wordpress-blog-post-seo
Post Body Structure
Use headings to break up text. This helps readers scan and search engines understand your content.
- H2 – main sections (like “Before You Write: Categories vs. Tags”)
- H3 – subsections (like “How to set them up”)
Write short paragraphs (2–4 sentences max). On mobile, long paragraphs are hard to read.
Add a Table of Contents (optional)
If your post is long (over 1500 words), consider a table of contents. In Kadence, you can use the “Table of Contents” block (free in Kadence Blocks).
Internal Links
Link to your own existing articles. For example, I linked to my hosting article when I mentioned shared hosting. This keeps people on your site longer.
Call to Action (CTA)
End each post with a clear next step. For me: “Leave a comment below or subscribe for more tutorials.”
3. Adding Images & Alt Text
Images make your post engaging. But they also affect SEO.
Featured Image
This is the thumbnail shown on your blog archive and social media. Set it in the right sidebar under “Post” → “Featured image”. Use a custom image or a free stock photo from Unsplash or Pexels.
In‑Post Images
Add images between sections to break up text. Use the “Image” block. Resize them so they’re not huge (max 1200px width is plenty).
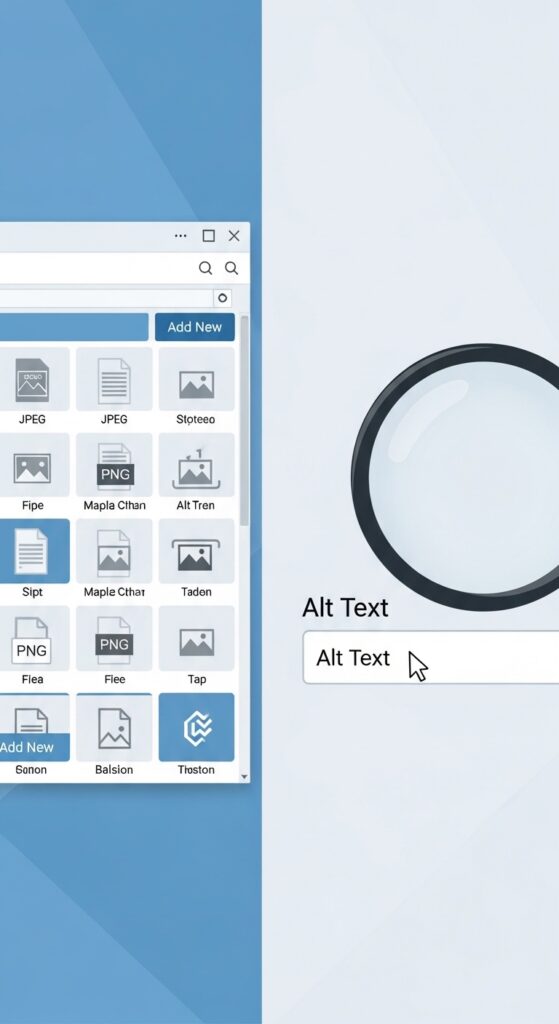
Alt Text (Critical for SEO)
Every image needs alt text – a short description of what the image shows. Search engines read alt text, and it’s also used by screen readers for blind users.
Example:
Bad alt text: image123.jpg
Good alt text: Person writing a WordPress blog post on laptop
To add alt text: click on the image in the editor, go to the right sidebar “Block” tab, and fill the “Alt Text” field.
4. Basic SEO with RankMath (Free Plugin)
You don’t need to be an SEO expert. A free plugin like RankMath (or Yoast SEO) guides you through the essentials.
If you haven’t installed RankMath yet, check my must‑have plugins list (Article #6 – coming soon). But here’s a quick setup:
Install RankMath
- Plugins → Add New → search for “RankMath SEO”
- Install and activate. It will show a setup wizard – follow the steps (most defaults are fine).
Optimize Your Post
When you edit a post, RankMath adds a section below the editor. Look for the “RankMath SEO” tab.
Focus on these three things:
- Focus Keyword – type the main keyword you want this post to rank for (e.g., “how to write first blog post”). Don’t stuff it everywhere – just use it naturally in the title, first paragraph, and one or two subheadings.
- SEO Title & Meta Description – RankMath will suggest a title and description. Edit them to be:
- Title: under 60 characters, include your keyword.
- Description: under 160 characters, explain what the post offers, include keyword.
- Readability – RankMath checks if your paragraphs are short, you use subheadings, etc. Aim for a green score (good).
💡 Don’t obsess over a perfect SEO score. Your first priority is writing for humans. Search engines will follow if your content is genuinely useful.
5. Categories & Tags (Revisited)
In the right sidebar of the post editor, you’ll see “Categories” and “Tags”.
- Check the main category for this post (e.g., “WordPress Zero to Hero”).
- Add relevant tags – I’d add:
writing blog posts,SEO basics,WordPress tips,beginner guide. Aim for 3–5 tags, not 20.
6. Publishing vs. Draft vs. Schedule
You have three options:
- Save Draft – save your work without publishing. Come back later.
- Preview – see how it looks before going live.
- Publish – make it live immediately.
- Schedule – choose a future date and time. This is great for building a consistent posting schedule.
My advice: Write your post a few days in advance. Set a schedule (e.g., every Tuesday at 9 AM). Use the “Schedule” option. Consistency builds an audience.
7. After Publishing: Promote Your Post
Writing is only half the job. Now share it:
- Share on social media – Twitter, LinkedIn, Facebook.
- Send to your email list (if you have one).
- Link to it from older posts (update relevant articles).
- Comment on other blogs (genuinely, not spam) and leave your link.
I also write a short blurb for Telegram – see the Telegram post below for an example.
🧪 Example: My First Post (Real Numbers)
When I published the “Why I Built My Site” article, here’s what happened:
- Day 1: 12 visitors (mostly me and friends)
- Week 1: 87 visitors
- Week 2: 230 visitors (after I shared it on Twitter and Reddit)
It wasn’t viral. But it was a start. Over time, Google began ranking it for long‑tail keywords like “why build WordPress site from scratch”. Small traffic adds up.
📋 Checklist for Your First Post
Before you hit publish, run through this list:
- Title is clear and includes keyword
- Permalink is short and uses hyphens
- At least one H2 heading (more if long post)
- Short paragraphs (2–4 sentences)
- Featured image added
- Alt text for all images
- Internal link to another post on your site
- Category selected (not “Uncategorized”)
- 3–5 relevant tags added
- RankMath SEO title & meta description filled
- Readability score is green or orange (not red)
- Call to action at the end (ask a question, suggest next post)
What’s next?
Now you have a published post. Next, we’ll talk about promoting your blog and tracking visitors with Google Analytics.
👉 Next article: How to Get Your First 100 Readers (and Track Everything with Google Analytics) – coming soon.
Have you published your first post yet? Drop the link in the comments – I’ll read it and give you feedback.
First published: April 30, 2026
Last updated: April 30, 2026
📌 Key takeaways (for skimmers)
- Use categories (broad) and tags (specific) correctly.
- Structure your post with H2/H3 headings and short paragraphs.
- Always add alt text to images.
- Install RankMath (free) for basic SEO guidance.
- Schedule your posts for consistency.
- Promote after publishing – don’t just wait for traffic.
🔗 Internal links used in this article
- Article #1 – Why I Built My Site
- Article #2 – Choosing Hosting
- Article #3 – Installing WordPress
- Article #4 – General Settings
- Article #5 – Build Homepage with Kadence
- Must‑have plugins list (future Article #6)
- Next article – Google Analytics (future)