
WPML and Polylang are the two leading WordPress multilingual plugins. For WooCommerce specifically, WPML wins on AI translation quality, multi-currency, and Elementor compatibility — but costs €99/year for up to 3 sites. Polylang has a free tier and a cheaper entry point, but you’ll pay €99/year separately for WooCommerce support, and multi-currency requires a third-party plugin.
Quick verdict:
Choose Polylang if you’re on a tight budget, don’t use Elementor, and are comfortable with a more manual workflow.
Choose WPML if you use Elementor, need multi-currency, or want AI translation that works without manual review.
The data is compelling. A 2024 study found that 76% of online shoppers prefer to buy products in their native language. And 40% will not buy from a website in a different language at all. That’s not a small percentage. That’s a massive chunk of potential revenue you’re leaving on the table.
But a multilingual store isn’t just about translating words. It’s about localization — adapting your entire shopping experience to each market.
This guide covers:
- Full feature comparison — pricing, AI translation, WooCommerce support, Elementor
- PTC vs DeepL — which AI translation engine actually produces publishable content
- Step-by-step setup for both plugins (with screenshots)
- Multi-currency options — built-in (WPML) vs third-party (Polylang)
- SEO setup — hreflang, subdirectories, translated slugs, sitemaps
- Performance impact — realistic overhead numbers for each plugin
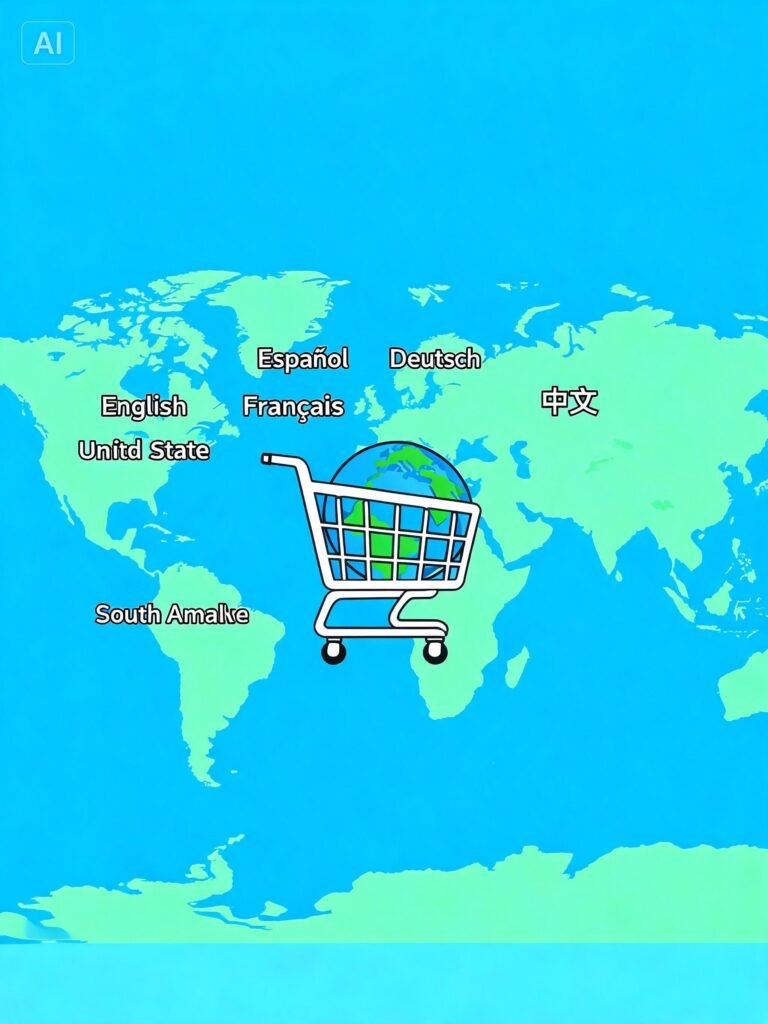
In this guide, I’ll walk you through everything:
- What a multilingual WooCommerce store really involves
- WPML vs Polylang – the two leading solutions compared in detail
- Step‑by‑step setup for each plugin (with screenshots and explanations)
- Translating products, pages, emails, and checkout
- Adding multi‑currency support (why it matters and how to do it)
- SEO considerations for multilingual stores (hreflang, URL structure, sitemaps)
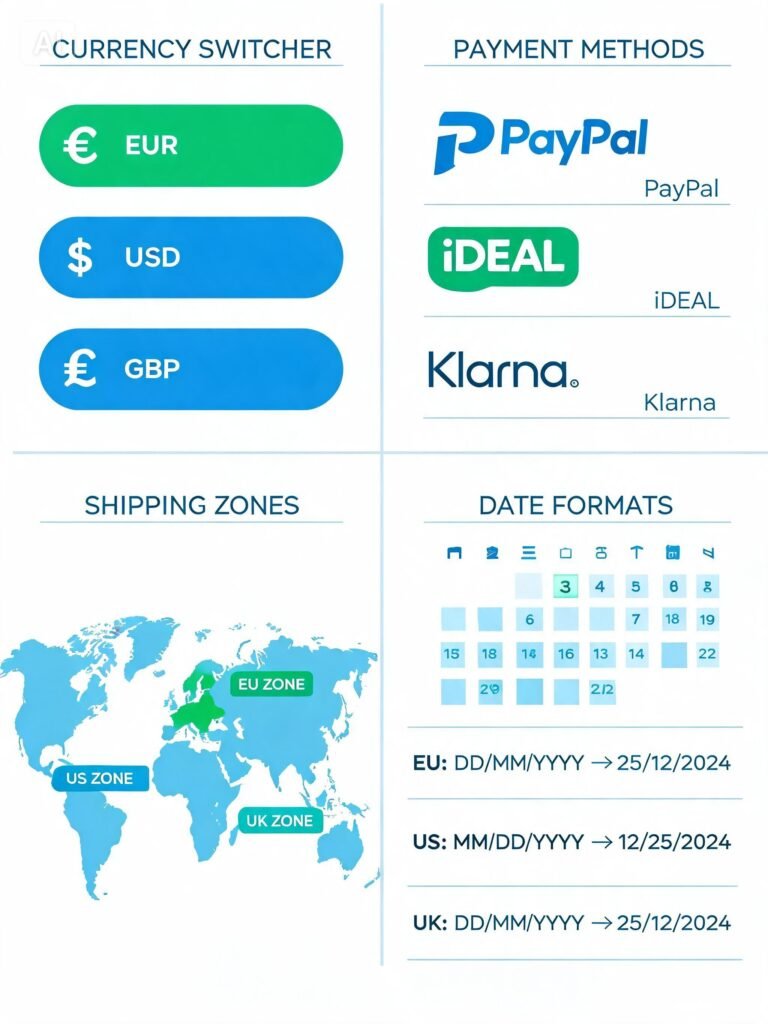
- Localization beyond translation (currencies, payments, shipping, date formats)
- Which plugin is right for your store
By the end, you’ll have a store that speaks your customers’ language — literally and figuratively.
Part 1: What Is a WooCommerce Multilingual Store?
A multilingual WooCommerce store is exactly what it sounds like: an online store that offers content in multiple languages. But it’s more than just slapping a Google Translate widget on your site (please don’t do that — it’s a terrible experience and terrible for SEO).
What a proper multilingual store includes
1. Front‑end translation:
- Product titles and descriptions
- Product attributes (size, color, material, etc.)
- Product variations (each variation option in every language)
- Product categories and tags
- Store pages (About, Contact, Blog, etc.)
- Cart and checkout pages
- My Account page (login, orders, downloads, addresses)
- System messages (“Added to cart”, “Out of stock”, etc.)
- Navigation menus
2. Back‑end translation:
- Admin interface (so you can manage the store in multiple languages)
- Email notifications (order confirmations, shipping updates, password resets)
3. Localization (beyond translation):
- Currency switching (display prices in local currencies)
- Payment method availability (iDEAL for Netherlands, SOFORT for Germany, etc.)
- Shipping zones and rates per country
- Tax rules (VAT rates per country — covered in the previous article)
- Date and number formats
What it takes to run a multilingual store successfully
Running a multilingual store is a significant commitment. Here’s what you need:
| Requirement | Why it matters |
|---|---|
| Dedicated multilingual plugin | WPML or Polylang (we’ll cover both) |
| Content strategy | You need content in each language, not just machine translations |
| Ongoing maintenance | When you update a product in one language, you need to update it in all languages |
| SEO knowledge | hreflang tags, translated slugs, separate sitemaps |
| Localisation expertise | Understanding each market’s preferences (currencies, payments, shipping) |
| Budget | Translation costs — either AI (cheaper) or professional (more accurate) |
The business case for going multilingual
If you’re still wondering whether it’s worth the effort, consider these numbers:
- 75% of online shoppers prefer buying in their native language (CSA Research, 2024)
- 40% will never buy from a site in a different language
- Stores with multilingual content see up to 50% higher conversion rates from non‑English markets
- Multilingual SEO gives you access to search volumes you simply don’t have in English only
If you’re selling plugins or digital products, the case is even stronger. Your product has no shipping costs, no customs delays, no physical barriers. The only barrier is language.
💡 If you’re selling digital products (like WordPress plugins), you can sell to the entire world — if you speak their language.
The three most important things to plan before you start
Before you install any plugin, plan these elements carefully:
1. Which languages? Start with one extra language. Don’t try to translate into 10 languages at once. Pick one market with clear demand. For most stores, Spanish is a great first choice — it’s spoken by over 500 million people across multiple continents.
2. Translation method? Who will translate? Professional translators are expensive but accurate. AI translation (WPML’s PTC or DeepL) is cheaper but may need review. Bilingual team members can help but take time away from other work.
3. URL structure? How will you structure your URLs? Sub directories (/es/), subdomains (es.yourstore.com), or separate domains (yourstore.es). Sub directories are recommended for most stores.
Part 2: WPML vs Polylang – The Head‑to‑Head Comparison
WPML and Polylang are the two most established WordPress multilingual plugins. Both store translations in your database and have substantial user bases. But they take very different approaches to pretty much everything.
Let me break down the differences in detail so you can make an informed decision.
At a glance comparison
| Dimension | WPML | Polylang |
|---|---|---|
| Pricing for WooCommerce site | €99/year (Multilingual CMS, 3 sites, all features, PTC AI included) | €139/year (Business Pack — Polylang Pro + Polylang for WooCommerce, 1 site) |
| Free tier | None — 30‑day money‑back guarantee | Yes — manual translation, no AI, unlimited languages |
| AI translation | PTC — built in, default for new sites | DeepL only, on Pro tier; free version has no AI |
| WooCommerce integration | Included free (WCML); multi‑currency & per‑currency gateways | Separate purchase (Polylang for WooCommerce); no multi‑currency |
| Elementor compatibility | ✅ Dedicated compatibility code | ❌ Officially “currently not compatible” per Polylang’s own docs |
| Translation workflow | Central Translation Dashboard with queue, roles, 70+ professional service integrations | Per‑page workflow only; no central queue |
| Setup wizard | ✅ Auto‑detects what your site uses | ❌ Manual |
| Translation of attributes | ✅ Full support | ✅ Full support |
| Translation of variations | ✅ Full support | ✅ Full support |
| Multiple domain support | ✅ Yes | ✅ Yes |
| SEO integration | ✅ RankMath, Yoast, All in One SEO | ✅ RankMath, Yoast, All in One SEO |
| Support | ✅ Priority support included | ✅ Polylang Pro includes support |
| Refund policy | 30 days | Not specified |
wpml vs Polylang: which is the better wpml alternatives?
A lot of users search for “WPML alternative Polylang” — they want to leave WPML. Here’s the honest answer:
Polylang is a valid WPML alternative if:
- You don’t use Elementor (Polylang is officially “currently not compatible”)
- You don’t need multi-currency (Polylang requires a separate plugin — WPML has it built in)
- You’re comfortable with a manual translation workflow (no central dashboard)
- You have a single site (Polylang’s Business Pack is 1 site; WPML’s €99 covers 3 sites)
- You don’t need AI translation on the free tier (Polylang free has no AI; WPML’s PTC is included)
Polylang is NOT a good WPML alternative if:
- You use Elementor or another page builder
- You sell internationally and need multi-currency
- You have multiple sites (WPML’s 3-site license wins on value)
- You want AI translation that produces publishable content without manual review
Bottom line: Polylang works for simple multilingual blogs. For WooCommerce stores with real international ambitions, WPML is usually the better long-term choice — even though it costs more upfront.
Understanding WPML’s pricing in detail
WPML’s Multilingual CMS plan costs €99 per year and includes:
- The core WPML Multilingual CMS plugin
- WooCommerce Multilingual (WCML) — for translating products, checkout, emails, and multi‑currency
- String Translation — for translating theme and plugin strings
- PTC AI translation credits (enough to translate a medium‑sized site)
- Updates and support for 1 year
- 3 sites included (you can install it on up to 3 different domains)
Renewal: After the first year, renewal is €79/year for continued updates and support. You can continue using the plugin without renewing, but you won’t get updates or support.
Understanding Polylang’s pricing in detail
Polylang’s pricing is more fragmented:
Polylang (free version):
- Translation of posts, pages, media, categories, post tags, and custom taxonomies
- Unlimited languages
- No WooCommerce support
- No AI translation
- No multi‑currency
- Manual translation only
Polylang Pro: €99/year
- All free features
- DeepL translation integration
- Support for custom post types and custom taxonomies
- Translations can be managed in a single screen
Polylang for WooCommerce: €99/year
- WooCommerce translation capabilities
- Translation of products, variations, categories, tags, attributes
- Translated store pages (cart, checkout, my account)
- Translated emails
Polylang Business Pack: €139/year
- Polylang Pro + Polylang for WooCommerce
- Best value if you need both
The catch: Polylang Business Pack is for a single site. If you have multiple sites, you need a separate license for each.
💡 If you have multiple sites, WPML’s 3‑site license is much better value.
Translation quality: PTC vs DeepL
WPML’s Private Translation Cloud (PTC) was scored higher than DeepL in a recent translation quality review across Arabic, English, French, German, Italian, and Spanish. PTC outperformed DeepL on every quality dimension measured — accuracy, fluency, terminology consistency, and cultural appropriateness.
What this means in practice:
- With PTC, most pages are ready to publish without a human review step
- With Polylang Pro’s DeepL integration, every page typically needs review before it’s safe to ship
- If you’re not willing to review every translation manually, WPML’s PTC will save you significant time
The Elementor gap — significant for many users
This is a big one. Polylang’s own documentation states Polylang Pro is “currently not compatible with Elementor and some builders”. Compatibility is available via “Polylang Connect for Elementor”, a third‑party plugin that costs extra and adds complexity.
Even with that connector, automatic translation through DeepL doesn’t work for Elementor content — pages built in Elementor have to be translated manually. That means if you have dozens of Elementor pages, you’re looking at hours of manual work.
WPML maintains dedicated compatibility code for Elementor. It’s built in, works automatically, and supports both manual and AI translation.
⚠️ If you use Elementor (or any other page builder), WPML is the safer choice.
Multi‑currency: WPML wins outright
This is non‑negotiable for serious international stores. Polylang for WooCommerce does not include multi‑currency support. You’ll need a separate currency plugin like:
| Currency plugin | Price | Integration with Polylang |
|---|---|---|
| CURCY – WooCommerce Multi Currency | $79/year | Works alongside Polylang but adds complexity |
| Shills Multi Currency Manager | Free (basic) / $49 (pro) | Basic integration |
| Advance WooCommerce Currency Switcher | $25 (one‑time) | Limited integration |
| WooCommerce Currency Switcher by Aelia | $49/year | Works but not officially integrated |
Adding a separate currency plugin means:
- More plugins to maintain
- Potential compatibility issues
- Additional cost
- User experience may be less smooth (currency switcher may not follow language selection)
With WPML, multi‑currency is built into WooCommerce Multilingual (WCML) . One plugin, seamless integration, automatic exchange rate updates, and a currency switcher that can follow language selection.
The setup experience: WPML is easier
WPML setup wizard:
- Install the plugins
- Click “Setup” in the WPML menu
- Auto‑detects your WordPress language, theme, and plugins
- Guides you through adding languages, choosing URL structure, and translating content
- Provides a checklist of what to do next
- Works out of the box with most themes and plugins
Polylang setup:
- Install the plugin
- Add languages manually
- Configure URL structure manually
- Set up language switcher manually
- If using Elementor, install and configure Polylang Connect for Elementor (third‑party plugin)
- Configure translations manually
Which one should you choose? Decision matrix
| Your situation | Recommendation | Why |
|---|---|---|
| Budget‑conscious, comfortable with manual translation, not using Elementor | Polylang (free) + Polylang for WooCommerce (if needed) | Cheaper, but more manual work |
| Need AI translation to save time | WPML | PTC is built in and more accurate than DeepL |
| Need multi‑currency | WPML | Polylang requires a separate, less integrated plugin |
| Using Elementor | WPML | Polylang’s Elementor support is third‑party and unreliable |
| Complex store with many products | WPML | Better translation workflow and central management |
| Small catalogue, simple needs | Polylang | Good enough for simple stores |
| Running multiple sites | WPML | 3‑site license is better value than multiple single‑site Polylang licenses |
| Want to save time | WPML | Setup wizard and AI translation save hours |
| Want to save money upfront | Polylang | Free version exists, but you’ll pay in time |
My honest recommendation: If you can afford €99/year, WPML is the better investment. The AI translation alone saves countless hours, and multi‑currency is essential for serious international sales. The setup wizard gets you started in minutes, not hours. And the 3‑site license is excellent value if you have multiple projects.
If you’re just starting out and really can’t afford €99/year, start with Polylang (free version). You can always migrate to WPML later (WPML provides an import tool for Polylang translations).
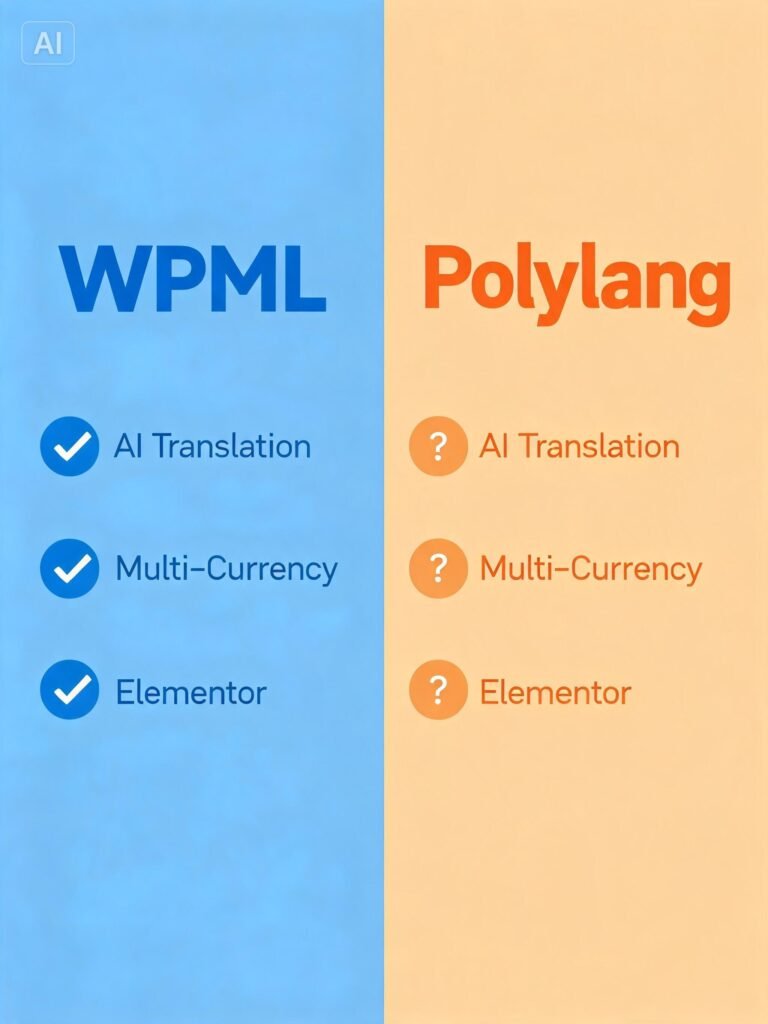
Part 3: Step‑by‑Step – Setting Up WPML for WooCommerce
This is the most common and recommended approach for most stores. Let’s walk through the entire setup process in detail.
Step 1: Install and activate required plugins
To translate WooCommerce with WPML, you need to install and activate these plugins:
Essential (3 plugins):
- WPML Multilingual CMS – the core plugin that powers everything
- WPML String Translation – translates theme strings, buttons, system messages, and plugin texts
- WooCommerce Multilingual & Multi-currency (WCML) – the WooCommerce add‑on
Where to get them:
- Purchase WPML Multilingual CMS from WPML.org (€99/year)
- Download the ZIP file
- In your WordPress admin, go to Plugins → Add New → Upload Plugin
- Upload the WPML ZIP file and activate it
- In the WPML dashboard, you’ll see available plugins under Plugins → Add New → Commercial. Install and activate String Translation and WooCommerce Multilingual from there.
What you’ll see:
- WPML Multilingual CMS adds a new menu item: WPML
- WooCommerce Multilingual adds a submenu under WooCommerce: WooCommerce → WCML
💡 WooCommerce Multilingual is completely free once you have a WPML CMS license. No additional purchase required.
Step 2: Run the setup wizards
After installing and activating the plugins, you’ll see setup wizards. Don’t skip these — they save massive time.
WPML Setup Wizard (the core setup):
- Go to WPML → Setup (or you’ll be redirected automatically)
- The wizard detects your site’s current language and asks which languages you want to add
- Choose your languages — for example, your site is in English, and you want Spanish and French
- Choose your URL structure:
- Different languages in directories (
/es/,/fr/) — recommended - Different languages in domains (
es.yourstore.com,fr.yourstore.com) - Language as parameter (
?lang=es) — not SEO‑friendly, avoid
- Different languages in directories (
- The wizard automatically creates translated versions of your existing pages (if they don’t exist yet)
- For new sites, you’ll see placeholder pages for each language
- Click “Done” — the wizard completes
WooCommerce Multilingual Setup Wizard (WCML):
- Go to WooCommerce → WCML (or click the link in the WPML setup wizard)
- The wizard appears — click “Start”
- It asks: “Do you want to translate WooCommerce pages automatically?”
- Yes — creates translated versions of your store pages (Shop, Cart, Checkout, My Account)
- No — you’ll create them manually
- Choose which product attributes to translate:
- All attributes — all attributes become translatable
- Only specific attributes — you choose which ones
- Optionally, add multiple currencies:
- If you plan to sell in multiple currencies, enable this now
- Add currencies (e.g., USD, GBP, EUR)
- Choose how exchange rates update (automatic or manual)
- Click “Finish” — WCML is configured
💡 If you skipped multi‑currency during setup, you can add it later in WooCommerce → WCML → Currencies.
Step 3: Add your languages (if you didn’t during setup)
If you need to add more languages later:
- Go to WPML → Languages
- Click “Add language”
- Choose from the list (you’ll see all available languages with their flags)
- The new language is added to your site
- You can now create translations for content in this language
Language settings to configure:
- Language switcher — choose where to display language switcher (menu, widget, footer, etc.)
- URL structure — choose how language appears in URLs
- Language detection — choose how to detect user’s language (browser language, URL, etc.)
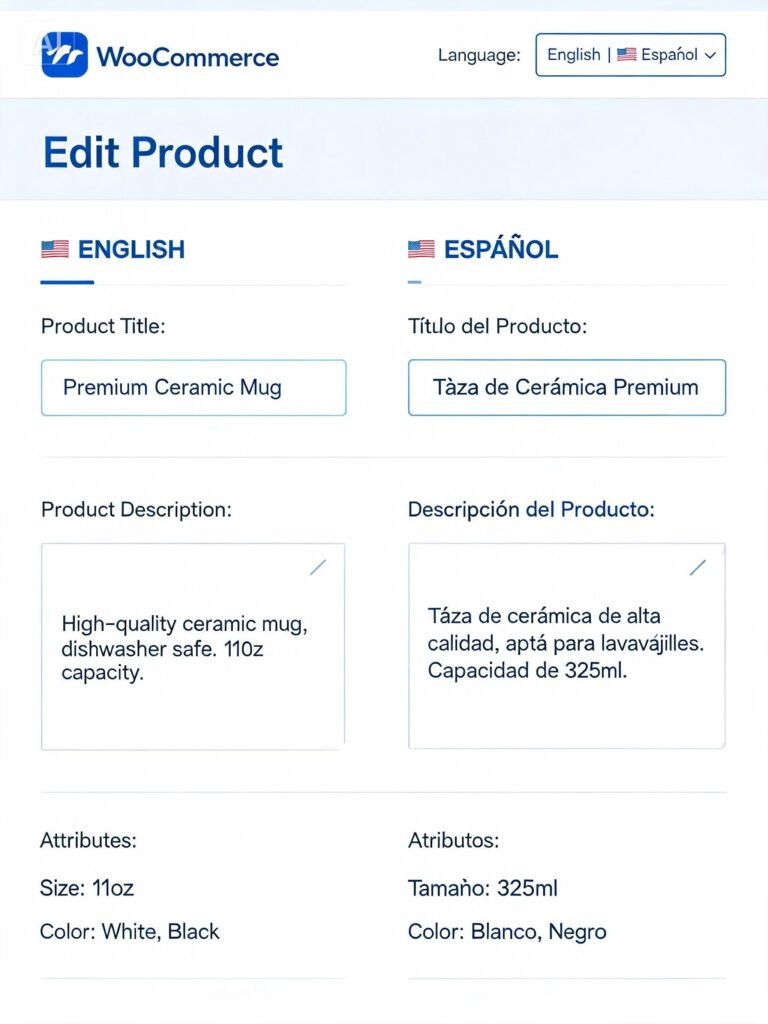
Step 4: Translate your products
This is the most important part — your products need to be understandable in each language.
Option A: Using the Translation Dashboard (recommended for multiple products)
- Go to WPML → Translation Dashboard
- You’ll see a list of all translatable content (posts, pages, products, etc.)
- Select the products you want to translate
- Choose your translation method:
- “Translate this yourself” — you’ll use the WPML Translation Editor
- “Translate by a professional” — send to one of 70+ translation services
- “PTC” — Private Translation Cloud (WPML’s AI translation)
- Click “Translate” — the content appears in the Translation Editor
- In the Translation Editor, you’ll see the source language on the left and target language on the right
- Translate each field: title, description, short description, attributes
- Save — translation is complete
Option B: Translating an individual product (for quick edits)
- Edit a product in your main language (e.g., English)
- In the product edit screen, you’ll see a language switcher in the top bar
- Click the “➕” icon next to your target language (e.g., Spanish)
- A new product edit screen appears — this is the Spanish version
- Enter the translated title, description, and all other fields
- Save — the Spanish version is complete
💡 When you update a product’s price or stock in the main language, it automatically updates across all translations. You don’t need to update each language separately for price/stock.
Step 5: Translate product variations and attributes
Variable products (with size, color, or other options) need special attention.
Translating attributes:
- Go to Products → Attributes
- For each global attribute you’ve created (e.g., “Size”), you’ll see language icons
- Click the language icon to add translations
- Enter the translated attribute label (e.g., “Taille” for French, “Tamaño” for Spanish)
- For each term (e.g., “Small”, “Medium”, “Large”), repeat the process
- The translated terms will appear in product variations automatically
Translating variations:
- When you translate a variable product, all variations are listed in the Translation Editor
- Each variation has its own fields: description, price (if you set prices per variation), and attributes
- Translate each variation’s attributes (e.g., “Small” → “Pequeño” in Spanish)
- If you want different prices per country, you can set this in WCML’s multi‑currency section
💡 WCML can also let you assign different prices per language. For example, if your product costs $50 in the US, you might sell it for €45 in Europe (accounting for currency differences).
Step 6: Translate your store pages
When you set up WCML, translated versions of Cart and Checkout pages are auto‑created for each active language. For most stores, no additional steps are needed.
If you add languages later, or want to check the translations:
- Go to Pages → All Pages
- You’ll see your store pages (Shop, Cart, Checkout, My Account) with language icons
- Click the language icon to edit each page
- The shortcodes (e.g.,
) remain the same — you just need to translate any custom text you’ve added
Step 7: Set up multi‑currency
This is where WPML really shines. Here’s how to set it up:
- Go to WooCommerce → WooCommerce Multilingual → Currencies
- Click “Add currency”
- Choose your currency (e.g., GBP for UK, EUR for Europe)
- Configure the currency format:
- Symbol position — before or after the amount
- Thousand separator — comma or space
- Decimal separator — period or comma
- Set your exchange rate:
- Manual — enter the rate yourself
- Automatic — updates daily (requires an API key)
- Choose which currencies appear for which languages:
- All currencies for all languages — customer can switch independently
- Currency follows language — English customers see USD, Spanish see EUR, etc.
- Choose the currency switcher display:
- List — full currency list (e.g., “$ USD”, “€ EUR”)
- Dropdown — dropdown menu with currencies
- Flags — flag icons representing countries
Pricing options (important):
| Pricing mode | What it does | Best for |
|---|---|---|
| Automatic conversion | Prices convert at current exchange rate | Simple stores, fewer products |
| Fixed prices per currency | You set a specific price for each currency | Stores wanting control over pricing strategy |
| Hybrid | Main currencies fixed, secondary auto‑converted | Most common — you control major markets |
Step 8: Translate emails
WCML allows you to translate WooCommerce transactional emails so customers receive order confirmations, shipping notifications, and more in their language.
- Go to WooCommerce → WooCommerce Multilingual → Emails
- You’ll see a list of all WooCommerce email templates:
- New Order (admin)
- Completed Order (customer)
- Processing Order (customer)
- Cancelled Order
- Refunded Order
- Customer Note
- Password Reset
- Click each email template and translate all fields:
- Subject — the email subject line
- Heading — the email heading
- Content — the full email body
- For each language, the customer will receive emails in their selected language.
💡 Your email service provider (if you’re using one for marketing) may also support multilingual emails. Klaviyo and Mailchimp both support language‑based segmentation.
Step 9: Translate system strings
WooCommerce, your theme, and other plugins use “strings” — small pieces of text like “Add to cart”, “Out of stock”, “Login”, etc. These need translation too.
- Go to WPML → String Translation
- You’ll see all strings from your theme, plugins, and WooCommerce
- Filter by domain:
woocommerce— WooCommerce stringswoocommerce-payments— WooPayments stringskadence— Kadence theme strings (if you’re using Kadence)
- For each string, enter the translation in each language
- Save — translations are applied immediately
💡 Most strings are automatically translated by WPML, but occasionally you’ll find one that needs manual adjustment. This is where you fix it.
Part 4: Step‑by‑Step – Setting Up Polylang for WooCommerce
Polylang takes a different, more manual approach. It’s lighter and free for basic use, but requires more effort.
Step 1: Install and activate plugins
Essential plugins:
- Polylang – free from WordPress.org
- Polylang for WooCommerce – €99/year, separate purchase
Where to get them:
- Go to Plugins → Add New and search for “Polylang”
- Install and activate the free version
- Purchase Polylang for WooCommerce from Polylang’s website
- Upload and activate it
💡 Polylang for WooCommerce is a separate purchase costing €99/year. The Business Pack (Polylang Pro + Polylang for WooCommerce) costs €139/year for a single site.
Step 2: Set up languages
- Go to Languages → Add New
- Enter the language name (e.g., “Español”, “Français”)
- Choose the language code (e.g., “es”, “fr”)
- Choose the country flag
- Click “Add Language”
Language settings to configure:
- Go to Languages → Settings
- Under “URL modifications”, choose your URL structure:
- The language is set from the directory name in pretty permalinks (
/es/,/fr/) — recommended - The language is set from the subdomain name (
es.yourstore.com,fr.yourstore.com) - The language is set from a parameter (
?lang=es) — avoid
- The language is set from the directory name in pretty permalinks (
- Under “Default language”, choose which language is shown to new visitors
- Under “Detect browser language”, choose whether to auto‑redirect based on browser settings
Step 3: Translate products and pages
Polylang adds a language column inside your WooCommerce product list. Here’s how to use it:
Translating a product:
- Go to Products → All Products
- You’ll see a new “Languages” column showing each product’s language
- Hover over the product you want to translate — you’ll see a “➕” icon for each language
- Click the “➕” for your target language (e.g., Spanish)
- This opens a new product edit screen — this is the Spanish version
- Fill in the translated fields:
- Product title
- Description
- Short description
- Attributes
- Variations (if variable product)
- The price, stock, and SKU are automatically copied from the original — you don’t need to re‑enter them
- Publish the translation
💡 Polylang for WooCommerce allows you to translate product categories, tags, and global attribute terms. You’ll find the translation icons in the respective admin screens.
Translating pages:
- Go to Pages → All Pages
- Find the page you want to translate (e.g., “Home”)
- Click the “➕” icon for your target language
- Fill in the translated page title and content
- Publish the translation
Step 4: Set up currency (separate plugin needed)
Polylang for WooCommerce does not include multi‑currency. You’ll need a separate plugin:
Option A: CURCY – WooCommerce Multi Currency
- Purchase CURCY from CodeCanyon ($79/year)
- Install and activate
- Go to CURCY → Settings
- Choose which currencies to support (e.g., USD, EUR, GBP)
- Configure exchange rates (manual or automatic)
- Under “Display”, choose where to show the currency switcher
- Choose whether currency follows language selection:
- Yes — English → USD, Spanish → EUR
- No — customer can choose independently
Option B: Shills Multi Currency Manager
- Install from WordPress.org (free version)
- Go to Shills → Settings
- Add currencies
- Configure exchange rates
- Choose display location
Option C: WooCommerce Currency Switcher by Aelia
- Purchase from Aelia ($49/year)
- Install and activate
- Configure currencies and exchange rates
⚠️ Adding a separate currency plugin means more plugins to maintain, potential compatibility issues, and additional cost. With WPML, multi‑currency is built in.
Step 5: Translate strings
To translate theme strings, WooCommerce system messages, and other fixed text:
- Go to Languages → Translations
- Find the string group you need to translate:
- WooCommerce — WooCommerce system strings
- Your theme — theme strings
- Plugins — other plugin strings
- Use the search function to find specific strings
- Enter translations for each string
- Save — translations are applied immediately
Example strings you’ll find:
- “Add to cart”
- “Out of stock”
- “Your cart is empty”
- “Proceed to checkout”
💡 If you can’t find a specific string, check if it’s in your theme’s translation files. Some theme strings aren’t registered for translation by Polylang — you may need to add them manually.
Step 6: Translate emails
Polylang for WooCommerce supports email translation:
- Go to WooCommerce → Settings → Emails
- Click on each email template
- At the top of the email settings screen, you’ll see language tabs
- Switch to each language tab and translate:
- Email subject
- Email heading
- Email body content
- Save each translation
💡 If you’re using a marketing email service (Klaviyo, Mailchimp), you’ll need to set up language‑based segmentation there separately.
Part 5: Managing Translations – Best Practices and Common Pitfalls
Regardless of which plugin you choose, here are the key principles for managing multilingual content effectively.
1. Maintain product synchronization
Stock levels, prices, and inventory should stay synchronized across language versions. Both WPML and Polylang for WooCommerce handle this automatically.
But watch out for:
- Manually editing price or stock in a translation — it won’t sync back to the main language. Always edit these in the main language.
- If you’re using multi‑currency, ensure your exchange rates are updating regularly.
2. Translate attributes and variations carefully
Variable products with multiple attributes require careful translation. If attribute structures aren’t defined properly, you’ll see inconsistencies across languages.
Best practice for attributes:
| Step | What to do |
|---|---|
| 1 | Create attributes in your main language first (e.g., “Size” with values “Small”, “Medium”, “Large”) |
| 2 | Translate each attribute label (e.g., “Size” → “Talla” in Spanish) |
| 3 | Translate each attribute value (e.g., “Small” → “Pequeño”) |
| 4 | When creating variations, ensure variations exist in all languages |
3. Keep URLs clean
Translate product and category slugs for SEO:
| Language | Original | Translated slug |
|---|---|---|
| English | /product/red-shirt/ | /product/red-shirt/ |
| Spanish | /product/red-shirt/ | /producto/camisa-roja/ |
| French | /product/red-shirt/ | /produit/chemise-rouge/ |
| German | /product/red-shirt/ | /produkt/rotes-hemd/ |
How to translate slugs in WPML:
- Edit the product translation
- Find the “URL slug” field (usually under the title)
- Enter the translated slug
- Save
How to translate slugs in Polylang:
- When creating a product translation, the slug field appears
- Enter the translated slug
- Publish
💡 Don’t change slugs after publishing unless you set up 301 redirects. Changing a slug breaks existing links and backlinks.
4. Update translations when products change
When you update a product in your main language, remember to update its translations.
WPML: The Translation Dashboard shows which products need updates. You’ll see a yellow “Update” icon next to products that have changed in the source language.
Polylang: You’ll need to check manually. There’s no central dashboard showing what needs updating.
Best practice: When you update a product, immediately update its translations. Don’t let them drift out of sync.
5. Use a translation memory (TM)
Translation memory stores previously translated phrases so you don’t pay to translate the same thing twice.
WPML: PTC includes translation memory. Professional translators also use TM. Your translations are stored and reused across your site.
Polylang: Polylang Pro’s DeepL integration doesn’t include a built‑in translation memory. If you’re using professional translators, they’ll have their own TM.
💡 Translation memory is especially valuable for product descriptions that share common phrases (“Made from premium materials”, “Free shipping”, etc.).
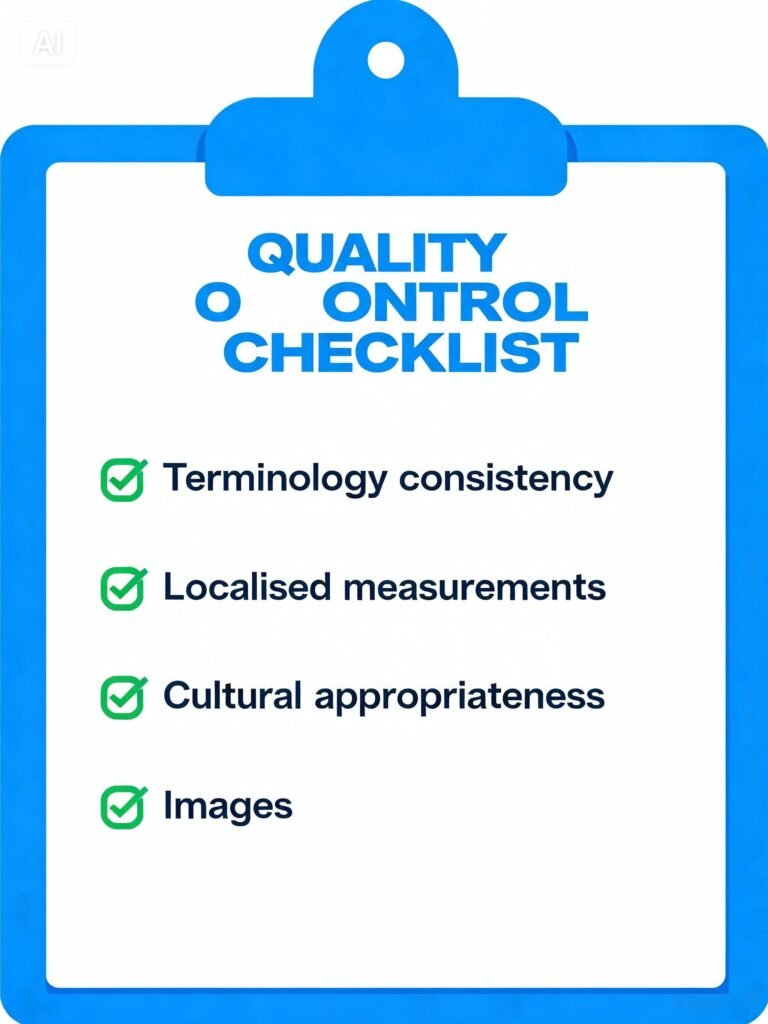
6. Quality control checklist
Before publishing translations, check:
| Check | Why it matters |
|---|---|
| Terminology consistency | Use the same terms for the same concepts across products |
| Localised measurements | Convert imperial to metric, date formats, etc. |
| Localised pricing | Account for currency differences and local purchasing power |
| Cultural appropriateness | Avoid idioms, references, or humour that don’t translate well |
| Images | Are any images text‑heavy and need replacement? |
| Checkout | Test a purchase in each language to ensure the flow works |
7. Common mistakes to avoid
| Mistake | Problem | Fix |
|---|---|---|
| Machine translation only | Inaccurate translations, cultural missteps | Always review machine translations |
| Incomplete translations | Products with translated title but untranslated description | Use a checklist to ensure all fields are translated |
| Inconsistent terminology | Confusing UX | Use a glossary for key terms |
| Forgetting images | Images with English text remain | Create separate images for different languages or use text‑free images |
| Forgetting system strings | “Add to cart” remains in English | Check String Translation for all WooCommerce strings |
| Ignoring local currencies | Prices shown in wrong currency | Set up multi‑currency correctly |
| Duplicate content in SEO | Google sees duplicate content across languages | Ensure hreflang tags are correct |
Part 6: SEO for Multilingual WooCommerce Stores
A multilingual store needs careful SEO setup to avoid duplicate content penalties and ensure the right language version appears in the right country’s search results. Google can penalise you for duplicate content if you’re not careful — and hreflang is how you tell Google this isn’t duplicate content, it’s content for different audiences.
6.1 URL structure — choose wisely
Choose one approach and stick with it. Changing URL structure later requires 301 redirects and can temporarily hurt rankings.
| Approach | Example | SEO impact | Maintenance effort | Recommendation |
|---|---|---|---|---|
| Subdirectories | yourstore.com/es/ | Best. Consolidates domain authority. | Low | ✅ Recommended |
| Subdomains | es.yourstore.com | Good. Treated as separate sites. | Medium | Acceptable |
| Separate domains | yourstore.es | Splits authority. Hard to maintain. | High | ❌ Avoid for most |
| Query parameters | ?lang=es | Poor. SEO‑unfriendly. | Low | ❌ Never use |
Why subdirectories are best:
When you use subdirectories (/es/, /fr/), all language versions share the same domain authority. Backlinks to your main domain benefit all language versions. With subdomains, Google treats them as separate sites, so SEO authority is split.
6.2 hreflang tags — The most important SEO element you need to get right
hreflang tags tell search engines which language version of a page to show to which user. Without them:
- Google might show your Spanish page to English‑speaking users in the US
- Google might show your English page to Spanish users in Mexico
- Duplicate content penalties might be applied incorrectly
- Users will see the wrong language and bounce — hurting your rankings
How hreflang works:
When a user searches on Google.es, Google looks at their language and location. If your page has hreflang tags, Google knows to show the Spanish version to that user.
Example hreflang output for a product page in English, Spanish, and French:
html
<link rel="alternate" hreflang="en" href="https://yourstore.com/product/red-shirt/" />
<link rel="alternate" hreflang="es" href="https://yourstore.com/es/producto/camisa-roja/" />
<link rel="alternate" hreflang="fr" href="https://yourstore.com/fr/produit/chemise-rouge/" />
<link rel="alternate" hreflang="x-default" href="https://yourstore.com/product/red-shirt/" />
What x-default means:
This is the fallback version. If a user’s browser language doesn’t match any of your supported languages, Google will show them the x-default version (usually your main language). This is important for users whose language you don’t support — they’ll at least see something.
How to verify hreflang is working:
- Visit any page on your site
- Right‑click → View Page Source
- Search for
hreflang— you should see all language alternates listed - Use Google Search Console’s International Targeting report to see if Google detects any hreflang errors
Common hreflang mistakes and how to fix them:
| Mistake | Problem | Fix |
|---|---|---|
| Missing return links | Page A links to Page B, but Page B doesn’t link back to Page A | Ensure all language versions link to each other (your multilingual plugin should do this automatically) |
| Incorrect language codes | Using en-uk instead of en-gb | Use standard ISO codes: en‑gb, en‑us, es‑es, es‑mx |
| Mixed HTTP/HTTPS | Some pages use http://, others https:// | Force HTTPS site‑wide (use a plugin like Really Simple SSL) |
| Self‑referencing only | Each page only references itself, not other languages | Both plugins handle this automatically — don’t disable it |
No x-default | No fallback for unsupported languages | Add x-default to your main language version |
6.3 Translate slugs (URLs) for better UX and SEO
Don’t leave product and category URLs in your main language. Translate them for better user experience and SEO.
| Language | Original | Translated slug |
|---|---|---|
| English | /product/red-shirt/ | /product/red-shirt/ |
| Spanish | /product/red-shirt/ | /producto/camisa-roja/ |
| French | /product/red-shirt/ | /produit/chemise-rouge/ |
| German | /product/red-shirt/ | /produkt/rotes-hemd/ |
Why translated slugs matter:
- Users are more likely to click on a URL they understand
- Google reads URLs to understand page content
- Translated slugs help localize search intent
How to translate slugs in WPML:
- Edit the product translation
- Find the “URL slug” field (usually under the title)
- Enter the translated slug
- Save
How to translate slugs in Polylang:
- When creating a product translation, the slug field appears
- Enter the translated slug
- Publish
Warning: Never change slugs after publishing unless you set up 301 redirects. Changing a slug breaks existing links, backlinks, and search engine indexation.
6.4 Translate meta data (SEO titles and descriptions)
RankMath and Yoast SEO both integrate with WPML and Polylang. When translating a product, you’ll see separate SEO meta boxes for each language.
What to translate:
| Element | What it is | Why it matters |
|---|---|---|
| SEO Title | The title that appears in search results | Primary ranking factor, influences CTR |
| Meta Description | The snippet below the title | Influences click‑through rate (CTR) |
| URL slug | The page URL | Improves readability and relevance |
| Alt text | Image descriptions | Accessibility + image SEO |
| Focus keyword | The keyword you’re targeting | RankMath/Yoast focus keyword per language |
Example: Translated SEO titles and meta descriptions
| Language | SEO Title | Meta Description | |
|---|---|---|---|
| English | “Red T‑Shirt – Buy Premium Cotton Tees | YourStore” | “Shop our premium red t‑shirt. 100% cotton, free shipping over $50. Order now.” |
| Spanish | “Camiseta Roja – Comprar Camisetas de Algodón | TuTienda” | “Compra nuestra camiseta roja premium. 100% algodón, envío gratis desde $50. ¡Pide ya!” |
| French | “T‑Shirt Rouge – Achetez des Tees en Coton | VotreMagasin” | “Achetez notre t‑shirt rouge premium. 100% coton, livraison offerte dès $50. Commandez !” |
💡 Keep meta descriptions under 160 characters to avoid truncation in search results. For other languages, aim for the equivalent character count (shorter for some languages, longer for others).
6.5 XML sitemaps — essential for indexation
XML sitemaps tell Google which pages exist on your site. For a multilingual store, you need sitemaps that include all language versions.
How WPML handles sitemaps:
WPML generates separate sitemaps for each language:
sitemap-en.xml(English)sitemap-es.xml(Spanish)sitemap-fr.xml(French)
It also generates a main sitemap (sitemap.xml) that references all language versions.
How to submit sitemaps in WPML:
- Go to Settings → Reading
- Ensure “Search Engine Visibility” is NOT checked (you want search engines to index your site)
- If using RankMath, go to RankMath → Sitemap Settings
- You’ll see the sitemap URL (e.g.,
yourstore.com/sitemap_index.xml) - Submit this URL to Google Search Console
- In Google Search Console, go to Sitemaps → Add a new sitemap
- Enter the sitemap URL and submit
How Polylang handles sitemaps:
Polylang generates a single sitemap with language annotations. Each URL includes the language code in the <loc> tag.
What to check in Search Console for multilingual sitemaps:
| Report | What to look for |
|---|---|
| Coverage | Are all language versions indexed? Check each language separately |
| International Targeting | Does Google see your hreflang tags correctly? |
| Sitemaps | Are all sitemaps submitted and processed? |
| Mobile Usability | Are all language versions mobile‑friendly? |
6.6 Regional targeting (country‑specific SEO)
If you’re targeting specific countries, you should also set up country‑specific targeting in Google Search Console.
- Go to Google Search Console
- Select your property
- Go to International Targeting
- Under “Country”, select the country for each language version
- Google will priorities showing that language version to users in that country
Example:
- English version → target United States, United Kingdom, Canada
- Spanish version → target Spain, Mexico, Argentina, Colombia
- French version → target France, Canada (Quebec), Belgium
💡 Country‑specific targeting helps Google understand that your Spanish version is for Spanish users in Spain, not Spanish speakers in the US (who might prefer English).
Part 7: Localization – Beyond Translation
Translation is just the start. A truly localised store adapts to each market’s specific preferences, behaviours, and expectations. This is what separates professional global stores from amateurs.
7.1 Currency localization
This is non‑negotiable. When a customer sees prices in their own currency, they understand the value immediately. When they see prices in a foreign currency, they hesitate.
Why currency localization matters:
| Behaviour | Impact |
|---|---|
| Customers prefer to see prices in their own currency | 80% of shoppers won’t buy if prices are in a different currency |
| Currency conversion adds friction | Customers have to mentally calculate the cost |
| Trust and credibility | Local currency signals you’re a legitimate local business |
How to implement currency localization:
With WPML (built‑in):
- Go to WooCommerce → WooCommerce Multilingual → Currencies
- Add your currencies (USD, EUR, GBP, etc.)
- Choose whether currency follows language or is independent
- Configure exchange rates (automatic or manual)
- Choose display format (symbol, position, separators)
- Enable the currency switcher (widget, menu, or shortcode)
With Polylang (need a separate plugin):
- Install a currency plugin (CURCY, Shills, etc.)
- Configure currencies and exchange rates
- Enable currency switcher
- Test that currency follows language if that’s what you want
Currency switcher placement:
| Location | Conversion impact | Best for |
|---|---|---|
| Header | High — always visible | Most stores |
| Menu | High — part of navigation | Stores with large language selection |
| Footer | Low — hidden at bottom | Minimalist stores |
| Popup | High — in‑your‑face | Stores aggressively targeting international visitors |
💡 Place the currency switcher near the language switcher. Users expect them to be together.
7.2 Payment method localization
Different countries prefer different payment methods. If you only offer credit card and PayPal, you’re losing customers.
Preferred payment methods by country:
| Country | Preferred methods |
|---|---|
| Germany | PayPal, credit card, Klarna, SOFORT |
| Netherlands | iDEAL, PayPal, credit card |
| France | Carte Bancaire, PayPal, credit card |
| UK | Credit card, PayPal, Klarna, Apple Pay |
| US | Credit card, PayPal, Apple Pay, Google Pay |
| Italy | PayPal, credit card, PostePay |
| Spain | PayPal, credit card, Bizum |
| Nordic countries | Swish, MobilePay, Vipps, credit card |
| Latin America | MercadoPago, PayPal, credit card |
| Asia | Alipay, WeChat Pay, credit card |
How to implement payment method localization:
- Enable multiple payment gateways in WooCommerce → Settings → Payments
- Configure conditional logic (payment methods appear based on customer location)
- Use a plugin like Conditional Payments for WooCommerce or Payment Methods by Country for WooCommerce
💡 The simplest approach: enable all payment methods and let customers choose. But for a more professional experience, show only the methods relevant to each country.
7.3 Shipping localization
Different countries have different shipping costs, carriers, and delivery times.
How to implement shipping localization:
- Go to WooCommerce → Settings → Shipping
- Create shipping zones for each country/region
- For each zone, create shipping methods:
- Flat rate — fixed shipping cost
- Free shipping — threshold‑based (e.g., free over $50)
- Table rate — based on weight, quantity, or price
- If using a shipping plugin (ShipStation, Shippo), configure rates per country
Example shipping zones:
| Zone | Countries | Shipping rates |
|---|---|---|
| Domestic | Your country | $5 flat rate, free over $50 |
| EU | All EU countries | $15 flat rate |
| Rest of World | All other countries | $25 flat rate |
7.4 Tax localization
Different countries have different tax rates (VAT in Europe, GST in Australia, sales tax in the US, etc.). This was covered extensively in the previous article on VAT.
Summary for multilingual stores:
- Ensure taxes are calculated based on customer location
- Display tax information in the local language and format
- For EU, ensure VAT is applied based on destination country (OSS)
- For US, ensure sales tax is applied based on shipping address
7.5 Date, time, and number format localization
Different regions use different formats. If these are wrong, your store looks unprofessional.
| Region | Date format | Time format | Number format |
|---|---|---|---|
| US | MM/DD/YYYY | 12‑hour (AM/PM) | 1,000.50 |
| UK | DD/MM/YYYY | 12‑hour (AM/PM) | 1,000.50 |
| Europe | DD/MM/YYYY | 24‑hour | 1.000,50 |
| Germany | DD.MM.YYYY | 24‑hour | 1.000,50 |
| Australia | DD/MM/YYYY | 12‑hour (AM/PM) | 1,000.50 |
How to set date and number formats:
- Go to WooCommerce → Settings → General
- Under “Currency options”, set:
- Thousand separator — comma (,) or period (.)
- Decimal separator — period (.) or comma (,)
- Number of decimals — 2
- In WordPress → Settings → General, set:
- Date format — choose based on your region
- Time format — 12‑hour or 24‑hour
💡 If you have different regions, you may need a plugin that adapts these settings per language. WPML handles this automatically. Polylang requires additional configuration.
7.6 Address format localization
Different countries have different address formats. A US address (street, city, state, ZIP) looks very different from a UK address (street, city, county, postcode) or a European address (street, house number, postal code, city, country).
How to handle address formats:
- WooCommerce handles this automatically to some extent (address fields adapt based on selected country)
- You can customise address fields using a plugin like Checkout Field Editor for WooCommerce
- Ensure translated field labels match local expectations (e.g., “ZIP” vs “Postcode”)
7.7 Social proof localization
Reviews and testimonials are powerful, but they’re only useful if customers can understand them.
What to localize:
- Translated product reviews (if you have multilingual reviewers)
- Localized testimonials (match the customer’s language)
- Translated social media feeds (if embedding)
💡 If you don’t have reviews in every language, consider using a translation plugin that translates reviews automatically — or simply display reviews in their original language with a clear language tag.
Part 8: Performance Considerations for Multilingual Stores
Multilingual plugins add overhead. Every language adds more data, more database queries, and more complexity. Here’s how to keep your store fast.
8.1 Why multilingual stores are slower
Multilingual stores are slower for several reasons:
- More database queries (checking for translations)
- More content to load (multiple language versions)
- More database tables (translation tables)
- More complex caching (language‑specific caching)
Estimated overhead:
| Feature | Overhead |
|---|---|
| WPML (basic) | 10‑20% slower on page load |
| WPML + WCML + multi‑currency | 20‑30% slower |
| Polylang (basic) | 5‑10% slower |
| Polylang + WooCommerce + currency plugin | 15‑25% slower |
💡 These are estimates. Actual overhead depends on your hosting, theme, and other plugins. A good cache system can reduce this significantly.
8.2 Caching for multilingual stores
Most caching plugins (WP Rocket, W3 Total Cache, Litespeed) support multilingual stores — but you need to configure them correctly.
Key caching requirements:
| Requirement | Why it matters |
|---|---|
| Language‑specific caching | Each language version has different content — they need separate caches |
| Currency‑aware caching | If you support multiple currencies, each currency needs separate cache |
| Exclude cart/checkout | Cart and checkout pages must be dynamic |
| Exclude user‑specific content | My Account pages should not be cached |
WP Rocket multilingual configuration:
- Go to WP Rocket → Cache
- Enable “Separate cache files for mobile devices”
- Under “Advanced”, add your languages to the cache prefix (WPML automatically handles this)
- Go to WP Rocket → File Optimisation
- Exclude the multilingual plugin’s scripts from minification (WPML scripts should be excluded)
- Test your store after enabling each caching option
💡 WP Rocket has excellent WPML support out of the box. For Polylang, you may need to adjust settings manually.
8.3 Hosting considerations
Multilingual stores need better hosting. The overhead means you’ll need more server resources.
| Store size | Recommended hosting |
|---|---|
| Small (<100 products, 2 languages) | Shared hosting (SiteGround, Hostinger) |
| Medium (100‑500 products, 3‑5 languages) | VPS or managed WordPress hosting (Kinsta, WP Engine) |
| Large (500+ products, 5+ languages) | Dedicated server or enterprise hosting |
💡 If you’re using WPML’s multi‑currency with 5+ currencies and 5+ languages, expect to pay more for hosting. The added complexity is worth it for global sales.
8.4 Image optimization for multilingual stores
Different languages don’t need different images — unless your images contain text.
What to do with text‑heavy images:
- Create separate images for each language if they contain text
- Use translation plugins that can replace images per language
- Avoid text‑heavy images — use text overlays instead
What to do with all images:
- Use a CDN (Cloudflare, BunnyCDN)
- Compress images (ShortPixel, Imagify)
- Use WebP format
💡 If you have multiple language versions of the same image, name them appropriately:
red-shirt-en.jpg,red-shirt-es.jpg,red-shirt-fr.jpg.
❓ Frequently Asked Questions
Q1: Do I need a multilingual plugin if I only sell digital products?
Yes. Even digital products benefit from multilingual checkout, emails, and support pages. Customers are more likely to buy when they understand everything. For digital products (like plugins), there are no shipping barriers — language is the only barrier.
Q2: Can I use both WPML and Polylang?
No. They conflict with each other. Choose one.
Q3: What about TranslatePress, Weglot, or GTranslate?
They’re valid alternatives, but each has limitations:
| Plugin | Approach | Strength | Weakness |
|---|---|---|---|
| TranslatePress | Visual front‑end editor | Easy to use | Limited WooCommerce support |
| Weglot | Cloud‑based, automatic translation | Quick setup | Monthly fee, limited control |
| GTranslate | Google Translate API | Free | Lower translation quality, SEO issues |
For a serious WooCommerce store, WPML or Polylang are more feature‑complete.
Q4: How much does professional translation cost?
Costs vary widely:
| Translation type | Cost per word | Example (500 words) |
|---|---|---|
| AI translation (PTC) | Included in WPML (capped) | $0‑$10 |
| AI translation (DeepL) | $0.01‑$0.03 | $5‑$15 |
| Professional human translation | $0.10‑$0.20 | $50‑$100 |
| Specialised (legal/technical) | $0.20‑$0.50 | $100‑$250 |
If you have 50 products with 500 words each (25,000 words total):
- AI translation: ~$50‑$100
- Professional translation: ~$2,500‑$5,000
💡 For most stores, a combination works best: AI translation for the first pass, then human review for accuracy.
Q5: Can I translate variations and attributes?
Yes. Both WPML and Polylang for WooCommerce support translating product variations and attributes. When you translate a variable product, all variations become translatable, and each variation’s options (size, color, etc.) are translated separately.
Q6: What happens if I add a new language later?
WPML: Go to Dashboard → Updates and update translations. WPML will prompt you to translate existing content into the new language.
Polylang: You’ll need to manually create translations for existing content. There’s no automatic process.
Q7: Will multilingual plugins slow down my store?
They add some overhead, but both WPML and Polylang are optimised for performance. With proper caching (WP Rocket, W3 Total Cache) and good hosting, most stores see minimal slowdown. Expect a 10‑20% performance hit at most, which is acceptable for the benefits.
Q8: Can I test translations before publishing?
Yes. Both plugins let you preview translations before making them live. WPML’s Translation Dashboard shows translation status and allows you to review before publishing. Polylang also shows translations in draft status before you publish them.
Q9: How do I handle customer support in multiple languages?
Consider these approaches:
- Multilingual support plugin — WPML’s Translation Management includes support ticket translation
- Separate support channels — Different email addresses per language
- Third‑party tools — Intercom, Zendesk, or Freshdesk with language support
- AI translation — Use AI to translate support tickets (not perfect but workable)
At minimum, have translated FAQ pages and contact forms in each language.
Q10: What about GDPR and multilingual stores?
Ensure:
- Your privacy policy is translated into all supported languages
- Cookie consent notices are translated
- Data processing information is clear in each language
Most legal plugins (like GDPR Cookie Consent, Complianz, or WPML’s own privacy pages) support multilingual setups.
Q11: How many languages should I start with?
Start with one extra language. Don’t try to translate into 10 languages at once. Pick one market with clear demand. For most English stores, Spanish is a great first choice — it’s spoken by over 500 million people across multiple continents, and conversion rates to Spanish are often higher than for French or German.
Add languages gradually as you see demand. Monitor your analytics to see which countries are visiting your site, then priorities those languages.
Q12: Can I sell in multiple currencies with Polylang?
Yes, but you’ll need a separate currency plugin. Polylang for WooCommerce doesn’t include multi‑currency. You’ll need a plugin like CURCY, Shills Multi Currency, or Aelia Currency Switcher. Adding a separate plugin means more maintenance and potential compatibility issues.
With WPML, multi‑currency is built in. This is one of the key reasons WPML is better for serious international stores.
What’s Next?
You now have a complete multilingual WooCommerce store – languages, currencies, localised checkout, and SEO. Your store can now sell to almost anyone, anywhere.
👉 Next article in this series: WooCommerce Accounting Integration – Xero & QuickBooks
We’ll cover how to sync your WooCommerce orders with popular accounting software to automate bookkeeping, invoicing, and tax reporting.
Are you planning to go multilingual? Which plugin are you leaning towards – WPML or Polylang? Let me know in the comments.
📌 Key Takeaways (for skimmers)
- Multilingual stores translate products, pages, emails, and checkout — plus localize currency, payments, shipping, and tax.
- WPML vs Polylang: WPML includes AI translation, multi‑currency, and Elementor compatibility. Polylang is cheaper but more manual.
- WPML pricing: €99/year for Multilingual CMS (3 sites, all features, PTC AI included). Polylang Business Pack: €139/year (Pro + WooCommerce, 1 site).
- AI translation: WPML’s PTC outperforms DeepL on every quality dimension. Polylang Pro uses DeepL (requires human review).
- Multi‑currency: WPML includes it. Polylang requires a separate currency plugin.
- SEO: Use subdirectories (
/es/,/fr/), let your plugin handle hreflang tags, translate slugs and meta data. Submit separate sitemaps. - Elementor: WPML has dedicated compatibility. Polylang is officially “currently not compatible”.
- Localization: Adapt currencies, payment methods, shipping, tax, date formats, and address formats per country.
- Performance: Expect 10‑30% overhead. Use caching plugins (WP Rocket) and good hosting.
- My recommendation: WPML for most stores. The AI translation and multi‑currency justify the €99/year cost.
🔗 Internal Links
- Article #1 – WooCommerce in 2026 – Market Share & Trends
- Article #2 – Installing WooCommerce & Setup Wizard
- Article #3 – Adding Your First Product
- Article #5 – Optimising Checkout for Digital Products
- Article #12 – WooCommerce Security & Performance
- You are here – WooCommerce Multilingual